<![CDATA[Martin Hujer blog]]> 2023-04-03T15:25:17.678Z https://blog.martinhujer.cz/ Martin Hujer mail@martinhujer.cz <![CDATA[My PHP and Symfony Development Setup on Windows]]> 2023-04-03T00:00:00.000Z https://blog.martinhujer.cz/my-php-and-symfony-development-setup-on-windows/ I've been using the same setup for a local PHP and Symfony development since 2017 and now and then I still see someone is using a less efficient setup, so I decided it deserves a write-up.

PHP Setup

Let's start with PHP itself. There are several options for running PHP locally. You can use XAMPP, WAMP, Docker or install PHP directly. Each of them has its pros and cons and my setup uses just plain PHP from windows.php.net.

All you need to do is to download the most recent PHP from windows.php.net (use the ZIP version VS16 x64 Non Thread Safe) and unpack it somewhere. In my case I use C:/dev/php to make the path short.

Next step is adding it to the system PATH so you can run it from anywhere with just php. (Google a guide on how to add a directory to system PATH if you are not sure how to do it.)

Now you can run php -v from a command line and it should print the PHP version (btw. I use cmder as my command line tool and it's awesome!).

Using multiple PHP versions

Things usually get tricky, when you need to maintain more applications where each requires a different version of PHP.

What works great for me is to version the PHP installation directory using git. I create a separate branch for each version (php81, php82 etc.) and checkout them when I need to work on some older stuff. I recommend using orphan branches as it makes the git history cleaner.

When upgrading to a newer patch version (e.g., 8.2.3 → 8.2.4), I delete almost everything in the directory and unpack a newer version there. I keep the php.ini and some other files (see the next parts of the post).

I push the repo to GitLab which allows me to maintain the same PHP configuration across multiple devices.

Another advantage of this approach is that you can easily test upcoming PHP versions when they are in the beta phase to help discover potential bugs in PHP or incompatibilities in your app.

Composer Setup

To install Composer I recommend downloading composer.phar file (lower on the page, in "Manual Download" section) and placing it in the php directory (so it is versioned in git with the rest of the PHP setup - it was quite useful during transition from Composer v1 to v2 when usually the projects running on newer PHP versions used Composer v2 and older ones on older PHPs used v1).

To be able to run Composer with composer command from anywhere, create a composer.cmd file in the php directory with the following content:

php c:\dev\php\composer.phar %*

It runs composer.phar with php and passes all the parameters you provided.

Just don't forget to keep the composer.phar and composer.cmd files when upgrading the PHP as described above.

Webserver

The best way to run a Symfony application during development is to use the Symfony CLI. But instead of using Scoop as they suggest I just download the zip linked bellow the "Binaries" heading and unzip it so the symfony.exe is in C:/dev/php/symfony.exe.

As we already have the C:/dev/php directory in the system PATH, we should be able to run symfony from command line anywhere.

To start the webserver, navigate to Symfony project directory and run symfony server:start. If you are using it for the first time, it will prompt you to install a newly generated root certificate so it can provide https:// for locally running application.

After starting, it will display something like this, and you should be able to access the URL in the browser.

[OK] Web server listening
      The Web server is using PHP CGI 8.2.4
      https://127.0.0.1:8000

Database, RabbitMQ, etc. in Docker

I prefer to run everything else besides the webserver in Docker (I mean MySQL, RabbitMQ, some mail catcher etc.). There are two main advantages:

  1. it allows you to easily switch versions either when upgrading the project or when working on multiple projects
  2. it is easy to run Linux-first tools even if you use Windows for development

You can do it by adding a docker-composer.yml file to you project and running docker-compose up from the CLI:

version: '3'
services:
    database:
        image: mariadb:10.3.18
        environment:
            - MYSQL_ROOT_PASSWORD=pass
        command:
            - --character-set-server=utf8mb4
            - --collation-server=utf8mb4_unicode_ci
        ports:
            - "9101:3306"

    mailer:
        image: maildev/maildev
        ports:
            - "1080:1080"
            - "1025:1025"

    rabbitmq:
        image: rabbitmq:3.11.11-management
        ports:
            - 5672:5672
            - 15672:15672

Symfony CLI supports Docker therefore if you use standard ports in docker-compose.yaml, it will recognize the services and will automatically configure the ENV variables such as DATABASE_URL accordingly.

To utilize this automatic ENV variables setup for CLI, you have run the Symfony Commands with symfony console, instead of php bin\console:

symfony console doctrine:migrations:migrate

For accessing the database outside the application, I use HeidiSQL which is Windows application for managing the database (I like it more than web tools such as Adminer or PhpMyAdmin).

Being efficient with aliases

I like using Composer Scripts to run dev tools included in the project such as PHPStan or PHP_CodeSniffer, but I hate typing long commands, so I have created an alias script in C:/dev/php/x.cmd:

php c:\dev\php\composer.phar %*

With that I can run cs script with x cs instead of composer cs. Similarly, for composer install, I just run x inst.

For running the Symfony Commands, I use another alias: c.cmd:

symfony console %*

Which allows me to run Symfony commands this way: c doctrine:migrations:migrate

There is a cool feature in Symfony Command component which allows you to shorten the commands as long they are still unique. It means that c d:m:m will run doctrine:migrations:migrate if there isn't another command with same starting letters. And because Composer uses Symfony Command under the hood, the same applies to any Composer commands.

Conclusion

What setup do you use for local development? Let me know in the comments! I would be delighted to learn how to optimize my setup even further.

]]>
<![CDATA[Anki AI - Add example sentences to Anki notes with ChatGPT]]> 2023-03-16T00:00:00.000Z https://blog.martinhujer.cz/anki-ai-example-sentences-for-anki-with-chat-gpt/ I've been learning German for almost a year, and I already have around 3 000 notes in my Anki database (Anki is an app for learning vocabulary using spaced repetition technique). But unlike English, where I can get high quality example sentences from Cambridge Dictionary, I have yet to find similar source for German vocabulary.

When the new and cheaper Chat Completion API from OpenAI became available I thought it may be the way forward. I tried it in the Chat GPT first, and it worked pretty great (Chat Completion API allows you the access the model used in ChatGPT using the API):

ChatGPT can generate example sentences for German vocabulary.

I tried it again and prefixed the inputs with IDs so the output can be parsed more easily:

ChatGPT can generate example sentences for German vocabulary with IDs.

Using GPT to Generate Example Sentences in Anki

Using GPT for generating example sentences seemed viable, so I considered my options to use it to generate examples to my whole German vocabulary database in Anki.

Even though Anki allows you to create plugins, they must be written in Python, so I decided to use another approach. There is a Anki Connect plugin which makes the Anki data available through REST API. I have been using quite a lot of TypeScript recently (It's fun to use it!) so it was my first choice to writing my app.

Fetching the data from Anki was easy. Chat GPT even helped me craft regular expressions to clean up the vocabulary data. As a result, I only passed the words to the API.

Next, I had to create a prompt for the API. This is a final version which persuades the Chat API to return same format of the response every time:

You are a helpful vocabulary learning assistant who helps user generate example sentences in German for language learning. I will provide each word prefixed by ID and you will generate two example sentences for each input. Each sentence in response must be on its own line and starting with ID I provided so it can be parsed with regex /^(\d+): (.*)$/

1675192165662: Schulden machen
1675192165652: der Lieferant
1675192165655: vollkommen

With such input, you get response like this (interestingly, the sentences are different every time you try it):

1675192165662: Man sollte sich immer genau überlegen, bevor Schulden gemacht werden
1675192165662: Schulden machen kann in der Zukunft zu großen finanziellen Problemen führen.
1675192165652: Der Lieferant hat das Paket heute Morgen geliefert.
1675192165652: Ich kann mich immer auf meinen Lieferanten verlassen.
1675192165655: Sie ist vollkommen glücklich mit ihrem neuen Job.
1675192165655: Das Essen war vollkommen in Ordnung, aber nicht besonders lecker.

The remaining steps were straightforward: parse the output and feed the data back into Anki.

Conclusion

The simple script I created (you can check the source code on GitHub) helped me generate the example sentences for my whole German database in Anki (~3 000 notes) and the API cost was around $0.5. That's why I did not bother optimizing the prompt length in any way (e.g., one optimization can be shortening the IDs, but there was no point in doing so).

I appreciate that the generated sentences are coherent and resemble real-world examples of the language (as far as I can tell).

If you want to try to use the script for your vocabulary, I added instructions to the README in the GitHub repository.

]]>
<![CDATA[How to add a non-nullable column without downtime]]> 2021-04-05T00:00:00.000Z https://blog.martinhujer.cz/how-to-add-non-nullable-column-without-downtime/ Database migrations are hard for many reasons. In this article I explain how to add a non-nullable column to an application when you are using Zero-Downtime deployments.

If you are using maintenance windows for releasing new versions, please read my article on why Deploying only during maintenance windows is an antipattern.

What is the problem?

Even if your deployment process is automated, there may be a delay between when the database migration runs, and the new version of the application is deployed. It may be a minute or two if you have just one application server but longer if you have a fleet of servers, and you are deploying gradually.

When you add a new non-nullable column to a table, inserts on this table will fail, until the new version of the application is deployed to all nodes, because it will try to insert NULL into a non-nullable column.

You can think "Whatever...my deploy is fast. Nobody will notice.", but please keep in mind that the deployment may fail at any phase - it may fail after the database migration was run but before the new code is deployed. Your production environment will be down until you can either roll back the database change or fix your deployment (npmjs down?).

Consider this example: you have simple todo-list app, and you want to allow users to decide whether the task is simple or complex. So in the new application version you add a type column and start inserting either simple or complex in that column.

ALTER TABLE `tasks`	ADD COLUMN `type` VARCHAR(50) NOT NULL;

What happens? After you run the migration and before the application deployment will finish, no tasks can be added to the application because of the error:

SQL Error (1364): Field 'type' doesn't have a default value

What can be done about it?

It's all about backwards compatibility

The solution is simple - the database changes must be backwards compatible.

The changes performed on the database must be also compatible with the currently deployed application version.

Step 1: add a nullable column

Instead of adding a non-nullable column, you add a nullable column first:

ALTER TABLE `tasks` ADD COLUMN `type` VARCHAR(50) NULL;

Even after the change, the database is still compatible with the current application version.

Step 2: fill the column in the application

If you are using an ORM or just prefer to keep all the logic in the application (because of testability), now it's time to update the entity to always set type column to value simple. This ensures that all new records will have a proper value set.

I usually do this in the same commit as Step 1 - I add the database field and update the entity to set a new field value. When deploying, the database is updated first, which is OK as the change is backwards compatible, and the code is deployed afterwards.

Note: We are not adding any complex logic yet!

Step 3: make the column non-nullable

Before the column can be made non-nullable, we must fill the values for the existing records. As we have only one task type now, we can do it like this:

UPDATE tasks SET `type` = 'simple' WHERE `type` IS NULL;

At this point, there shouldn't be any NULL values left, so we can change the column to NOT NULL:

ALTER TABLE `tasks` CHANGE COLUMN `type` `type` VARCHAR(50) NOT NULL;

Step 4: Start using the column

Finally, you can change the application to allow choosing task type and deploy this version without any additional database changes.

If something goes wrong with the new application changes, you can easily revert to the previous application version without any changes to database structure.

How to remove the non-nullable column?

Removing column is quite similar but backwards:

  1. Make the column nullable in the database.
  2. Stop using the column in the application and deploy it.
  3. Remove the column from the database.

How to rename a column in a database?

Renaming a column with zero downtime is hard (you need to add a new column and remove the old afterwards), so do it only when really necessary.

  1. Add a new nullable column to database.
  2. Change the application, so it fills both columns with the same value (and deploy it).
  3. Copy the values from the old column to the new column using SQL.
  4. Make the new column non-nullable.
  5. Change the application, so it always reads the new value (and deploy it).
  6. Make the old column nullable.
  7. Stop filling in the old column in the application (and deploy it).
  8. Remove the old column from the database.

Conclusion

Adding a new non-nullable column to the database without downtime is more work that just running an ALTER TABLE, but it is worth it because it allows you to deploy changes anytime without waiting for a maintenance window.

]]>
<![CDATA[Deploying only during maintenance windows is an antipattern]]> 2021-04-04T00:00:00.000Z https://blog.martinhujer.cz/maintenance-window-antipattern/ In this article I argue that deploying the new web application versions only during a maintenance window is an antipattern, and you should strive to have Zero-Downtime deployments.

It has long been a common practice to take a website or a web application down regularly and deploy a new version during that downtime. It is easy: You just schedule a 3-hour maintenance window between midnight and 3AM, make the application return "We are performing maintenance" page with an HTTP 503 code and do the upgrade or whatever during that time. And try to get some sleep afterwards.

Apart from the obvious advantages - nobody is messing with the application when you are releasing a new version, there are many reasons why it is not such a good idea:

  1. There is no natural maintenance window
  2. It's better to sleep at night
  3. The computers never sleep
  4. Business won't wait for your maintenance window
  5. Small changes are safer

1. There is no natural maintenance window

There are natural maintenance windows only for a small part of the web applications - e.g., when you are working on a B2B application which is used only by business only during their business hours, and they are all in one time-zone.

When you are making a B2C application - ecommerce website or something like that, there is always going to be someone using your application. There are people working shifts, so they may be bored during a night shift and want to browse your website.

Or you go global and suddenly there is always someone's afternoon somewhere.

If you schedule maintenance window to the time when someone needs to use the application, you will annoy your existing users and lose any potential new customers who will visit the application during downtime.

And there are some questions which needs answering: What happens when someone filled a form a minute before the maintenance window and tries to submit it during the maintenance window? Will it fail? How? What about the data they entered?

Note: At least don't forget to send proper HTTP 503 status code or your temporary page may be indexed by search engines.

2. It's better to sleep at night

I'm a morning person (usually getting up at 7 AM, back at bed at 11 PM) so staying awake beyond midnight is really hard, and I guess I won't be very good at debugging a thorny production issue at 3 AM.

The more important is that messing up your sleep rhythm is bad for your health. If I stayed up until 3 AM, I would be useless the next day even after sleeping in. And my sleep rhythm will be disturbed for a few days at least. So, it is not worth it health- and productivity-wise.

3. The computers never sleep

The computers never sleep, so even if there is a natural maintenance window, there may still be API calls coming to your application, webhooks may be called, etc. And depending on the 3rd party error handling, those may or may not be retried later.

4. Business won't wait for your maintenance window

If you can deploy new features only once every two weeks, the businesspeople in your company won't be happy having to wait up two weeks for a small change to go live. If they worked somewhere else where Zero-Downtime deployments where common, they would see you as incompetent.

Don't forget that if there is a competition moving faster than you, you risk losing customers to them.

5. Small changes are safer

Imagine there are 20 different changes in the release, and something breaks, or the load suddenly increases after the deployment. How will you debug it? It can be any of those 20 changes. If you did deploy only one change it would be both easier to debug the problem or rollback the change completely.

How do you rollback a big release with many database changes? And what if you discover the issue the day after the release? You cannot just revert to the older backup. You are out of luck.

So, what should we do instead?

  • Automate the deployment process
  • Deploy each change separately
  • Be careful about database migrations (I will write a separate post about database migrations without downtime)
  • Even if it may seem that the change warrants a maintenance window, try to think hard how to decompose it into several steps which may be deployed gradually without downtime.

Conclusion

When you consider the downsides discussed above, it does not seem that bad to spend some time on making your deployment process Zero-Downtime, right?

Please note that there are rare occasions when it is dramatically easier to schedule the maintenance window instead of doing it gradually (e.g., migrating the database to a new server). But those should be rare once-a-year special occasions, not part of your regular deployment process.

]]>
<![CDATA[Clever way to sort PHP arrays by multiple values]]> 2019-11-27T00:00:00.000Z https://blog.martinhujer.cz/clever-way-to-sort-php-arrays-by-multiple-values/ In the post I will describe a clever trick which allows you to easily sort PHP array or collection by multiple values.

Let's start from the beginning. Sorting using usort and uasort functions works by providing a callback for comparing two values in the array. From the docs:

The comparison function must return an integer less than, equal to, or greater than zero if the first argument is considered to be respectively less than, equal to, or greater than the second.

Basic sorting

The simplest example may look like this (when having an array of Product instances):

// order products by: price ASC
usort($products, function (Product $a, Product $b): int {
    return $a->getPrice() <=> $b->getPrice();
});

You can notice that I'm using a spaceship operator <=> which was added in PHP 7.0. It compares two expressions, $a and $b, and returns -1, 0 or 1 when $a is respectively less than, equal to, or greater than $b.

The example above can be simplified more using the arrow functions from PHP 7.4 (although I wouldn't say that it is more readable):

usort($products, fn (Product $a, Product $b): int => $a->getPrice() <=> $b->getPrice());

To sort the values in the descending order, just swap $a and $b expressions in the callback:

// order products by: price DESC
usort($products, function (Product $a, Product $b): int {
    return $b->getPrice() <=> $a->getPrice();
});

Sorting by two properties

If you want to sort the products by two fields, price ASC and products in stock first, it gets tricky. First you need to check whether the prices are equal. If they are you compare the inStock flag to have the available products first. Otherwise just compare the prices.

// order products by: price ASC, inStock DESC
usort($products, function (Product $a, Product $b): int {
    if ($a->getPrice() === $b->getPrice()) {
        return $b->isInStock() <=> $a->isInStock();
    }
    return $a->getPrice() <=> $b->getPrice();
});

Sorting by multiple properties

It will get much more complex when you want to sort the array by three or four properties:

// order products by: price ASC, inStock DESC, isRecommended DESC, name ASC
usort($products, function (Product $a, Product $b): int {
    if ($a->getPrice() === $b->getPrice()) {
        if ($a->isInStock() === $b->isInStock()) {
            if ($a->isRecommended() == $b->isRecommended()) {
                return $a->getName() <=> $b->getName();
            }
            return $b->isRecommended() <=> $a->isRecommended();
        }
        return $b->isInStock() <=> $a->isInStock();
    }
    return $a->getPrice() <=> $b->getPrice();
});

You have to carefully craft the conditions and don't miss the places where you are comparing $b with $a instead of $a with $b to sort them in descending order.

This example is quite close to what I needed when working on OutdoorVisit.com tickets list in activity detail. I couldn't do it in the database because there was some preprocessing (non-database filtering etc.) required.

I didn't want to have this complex sorting logic written as above, so I came up with the following solution.

Solution

// order products by: price ASC, inStock DESC, isRecommended DESC, name ASC
usort($products, function (Product $a, Product $b): int {
    return
        ($a->getPrice() <=> $b->getPrice()) * 1000 + // price ASC
        ($b->isInStock() <=> $a->isInStock()) * 100 + // inStock DESC
        ($b->isRecommended() <=> $a->isRecommended()) * 10 + // isRecommended DESC
        ($a->getName() <=> $b->getName()); // name ASC
});

I compare all attributes that impact the sorting in the same expression. I also add weight to each comparison to prioritize them.

The trick is that the return value from the callback can be any positive or negative integer, not just -1 or 0 or 1. It allows me to sum the separate comparisons together and return it as a result.

It can be further simplified using arrow function from PHP 7.4:

// order products by: price ASC, inStock DESC, isRecommended DESC, name ASC
usort($products, fn (Product $a, Product $b): int =>
    ($a->getPrice() <=> $b->getPrice()) * 1000 + // price ASC
    ($b->isInStock() <=> $a->isInStock()) * 100 + // inStock DESC
    ($b->isRecommended() <=> $a->isRecommended()) * 10 + // isRecommended DESC
    ($a->getName() <=> $b->getName()) // name ASC
);

Solution (from František Maša)

František Maša suggested even better solution in the comments. Thanks!

usort($products, fn (Product $a, Product $b): int =>
    [$a->getPrice(), $b->isInStock(), $b->isRecommended(), $a->getName()]
    <=>
    [$b->getPrice(), $a->isInStock(), $a->isRecommended(), $b->getName()]
);

Conclusion

Let me know in the comments if you find this trick useful.

Or do you have a better way of doing this?

]]>
<![CDATA[How to configure PHPStan for Symfony applications]]> 2019-10-23T00:00:00.000Z https://blog.martinhujer.cz/how-to-configure-phpstan-for-symfony-applications/ PHPStan is a fantastic tool for a static analysis of PHP code. It reads the code and PHPDoc and will try to detect potential issues such as:

  • undefined variables
  • incorrect types passed throughout the codebase
  • use of non-existent methods and attributes
  • passing of incorrect number of parameters to a method
  • use of possible null-pointers
  • lot more...

Apart from being able to analyse regular PHP code, PHPStan can understand even some framework-specific magic using custom-made extensions.

But let's start from the beginning...

PHPStan installation

You can install PHPStan either directly with all its dependencies by running:

composer require --dev phpstan/phpstan

Or you can install phpstan-shim:

composer require --dev phpstan/phpstan-shim

The advantage of phpstan-shim is that it is a Phar file with all the dependencies packed inside (and prefixed), so they won't conflict with other dependencies you may have in your project. Therefore, I prefer using phpstan-shim.

To have the extensions configured automatically, you need to install phpstan/extension-installer:

composer require --dev phpstan/extension-installer

Using PHPStan

PHPStan can be run this way:

vendor/bin/phpstan analyse -l 0 src tests

It will probably report bunch of errors depending on your project size and age. The best approach from here is to gradually fix the issues and raise the level of strictness (-l 1 etc.).

If there are some issues which cannot be fixed easily, you can exclude them from the report. When doing so, try to be specific and put the filename in the exclude, so you won't exclude the issues from the whole project. And don't forget to properly escape the regular expressions, or you may be excluding way more things than you wanted (hint: | needs to be escaped too). Those exclusions should be included in phpstan.neon configuration file (which is passed as -c phpstan.neon to the analyse command).

You should also have a look at a new Baseline Feature in PHPStan, which allows you ignore all the current issues and let the PHPStan check just the new code.

Adding PHPStan to CI build

To prevent issues from creeping back to the codebase, you should include PHPStan in you CI build to have it fail when a new error appears.

It can be done easily by using Composer Scripts. Your scripts section in composer.json can look like this:

"scripts": {
    "phpstan": "phpstan analyse -c phpstan.neon src tests --level 7 --no-progress", 
    "tests": "phpunit",    
    "ci": [
        "@phpstan",
        "@tests"
    ],
}

It will run both the phpstan and tests scripts when you run composer ci.

Note: If you have a Symfony application, you will already have a scripts section in your composer.json, so just add new items there.

You can read more thoroughly about Composer Scripts in my article Have you tried Composer Scripts? You may not need Phing.

Configuring the Symfony extension

You might have noticed that PHPStan reports some issues in Symfony-specific code, that works OK. It is because there is no way for PHPStan to understand Symfony magic just from the code itself. It includes getting services from Container (you should not be doing it anyway!), working with arguments and options in Commands and much more.

To have those errors disappear, you need to install phpstan/phpstan-symfony extension and provide PHPStan with a path to Symfony container compiled to XML. It is usually stored in the var/cache/dev directory. The following configuration should be added to phpstan.neon file:

parameters:
    symfony:
        container_xml_path: var/cache/dev/srcApp_KernelDevDebugContainer.xml

Also, to have the Commands analysed properly, PHPStan needs a console loader. It is a script that initializes the Symfony Console for the application and passes it to PHPStan. It can use it to determine the arguments or options types etc.

I usually put it in build/phpstan/console-loader.php:

<?php declare(strict_types = 1);

use App\Kernel;
use Symfony\Bundle\FrameworkBundle\Console\Application;

require dirname(__DIR__) . '/../config/bootstrap.php';
$kernel = new Kernel($_SERVER['APP_ENV'], (bool) $_SERVER['APP_DEBUG']);
return new Application($kernel);

The configuration file phpstan.neon should look like this:

parameters:
    symfony:
        container_xml_path: var/cache/dev/srcApp_KernelDevDebugContainer.xml
        console_application_loader: build/phpstan/console-loader.php

With this configuration, PHPStan can understand the Symfony code. It also checks that you are not fetching non-existent (or private) services from container.

Configuring PHPStan with PHPUnit

In the previous part we have successfully configured PHPStan to check various things in Symfony projects. However, it is still possible to improve the configuration.

We are now using same configuration file for both src and tests, but Symfony uses a separate container when running in either dev or test environments. It means that PHPStan will report errors such as Service "Doctrine\ORM\EntityManagerInterface" is private. even if the tests work fine.

The solution is simple - use a separate configuration file for src and for tests. We can keep the current phpstan.neon, but we have to create specific configuration for tests - phpstan-tests.neon. It will look very similarly with only change being the container_xml_path which now points to the container compiled in var/cache/test:

parameters:
    symfony:
        container_xml_path: var/cache/test/srcApp_KernelTestDebugContainer.xml
        console_application_loader: build/phpstan/console-loader.php

You need to adjust the scripts setup in composer.json to run PHPStan twice - first for the src directory and then for the tests with a different configuration file. When using this setup, you can still run composer phpstan which in turn runs checks for both src and tests.

"phpstan": [
    "@phpstan-general",
    "@phpstan-tests"
],
"phpstan-general": "phpstan analyse -c phpstan.neon src --level 7 --no-progress",
"phpstan-tests": "phpstan analyse -c phpstan-tests.neon tests --level 7 --no-progress",

I know that the PHPStan configuration is duplicated a little bit, but that does not matter much (you are not adding new extensions that often).

One thing that you must keep in mind is that the Symfony container must be compiled before it can be used for analysis. You can do it by running bin/console cache:warmup --env=dev and bin/console cache:warmup --env=test. As it needs to be part of the CI build, you can put it to the Composer scripts as well:

"phpstan": [
    "@php bin/console cache:warmup --env=dev",
    "@php bin/console cache:warmup --env=test",
    "@phpstan-general",
    "@phpstan-tests"
],

Or you can put it into a separate script, so it won't be slowing you down when running PHPStan repeatedly without changes in the container (but you must make sure that the container is recompiled for the test environment after change).

Finally, we are getting to configuring the PHPUnit extension itself. We need to install it through Composer:

composer require --dev phpstan/phpstan-phpunit

It will be included automatically thanks to the phpstan/extension-installer we installed in the beginning. So that's it.

PHPStan and Doctrine ORM

Doctrine ORM contains even more magic things which can't be inferred just from the code itself. Repository and Entity Manager use object type in lot of places, so the PHPStan won't know which type is there and you would need to add lots of inline PHPDoc to make it work.

Or you can install phpstan/phpstan-doctrine extension which helps PHPStan to understand Doctrine magic.

composer require --dev phpstan/phpstan-doctrine

Like with Symfony extension, you must help Doctrine extension by creating a loader script that provides an Entity Manager so PHPStan can query it about various things. I usually put it into build/phpstan/doctrine-orm-bootstrap.php and the script should look like this:

<?php declare(strict_types = 1);

use App\Kernel;

require dirname(__DIR__) . '/../config/bootstrap.php';
$kernel = new Kernel($_SERVER['APP_ENV'], (bool) $_SERVER['APP_DEBUG']);
$kernel->boot();
return $kernel->getContainer()->get('doctrine')->getManager();

You should add this to respective sections in both phpstan.neon and phpstan-tests.neon:

parameters:
    doctrine:
        objectManagerLoader: build/phpstan/doctrine-orm-bootstrap.php

With this setup PHPStan will use the EntityManager to also check your DQLs and Query Builders, which is awesome.

Next version of PHPStan-Doctrine extension will also support analysis of the entity annotations to determine whether the property type matches the column type, whether the property types for associations are defined correctly etc.

Bleeding edge features

PHPStan can check even more things when you enable bleeding edge rules from the core of PHPStan. Current PHPStan release is 0.11.x is mostly backwards compatible (not that many new issues are detected between patch versions). However, Ondra practices something along the lines of the trunk-based development, where new features (checks!) are hidden behind feature flags.

You can enable all of them by adding this to your configuration files (applies to phpstan-shim, the path will be different for a regular installation):

includes:
    - phar://phpstan.phar/conf/bleedingEdge.neon

Strict rules

There is a phpstan/phpstan-strict-rules package which adds opinionated checks not included in the PHPStan core. You can install it through Composer:

composer require --dev phpstan/phpstan-strict-rules

And suddenly you will get many more potential issues or bad practices reported :-)

Conclusion

If you configure the PHPStan according to this article, it will change your life :-) (at least a little bit).

Nowadays I can't imagine developing modern PHP applications without PHPStan running on max level with lots of checks. It helps to prevent many issues during development and refactoring of the applications.

]]>
<![CDATA[Jaké novinky přinese PHP 7.4]]> 2019-10-07T00:00:00.000Z https://blog.martinhujer.cz/jake-novinky-prinese-php-7-4/ Vydání PHP 7.4 je plánováno na 28. listopadu 2019. Přináší hromadu zajímavých věcí – Typed Properties, Arrow Functions, Preload, FFI a pár dalších vylepšení. Sice přibyly i nějaké deprecations, ale typicky se týkají podivného chování, takže upgrade by měl být snadný.

Článek vyšel na serveru Zdroják.cz

]]>
<![CDATA[How to use Data Providers in PHPUnit]]> 2019-09-03T00:00:00.000Z https://blog.martinhujer.cz/how-to-use-data-providers-in-phpunit/

I think that even if you are already using Data Providers, you will find some of those tips useful.

Data Providers are a handy feature of PHPUnit which allows you to run the same test with different inputs and expected results. This is useful when you are writing some text filtering, transformations, URL generation, price calculations, etc.

Let's say you are implementing your own trim function and you need to test it with lots of tests like the following one:

<?php

public function testTrimTrimsLeadingSpace(): void
{
    $input = ' Hello World';
    $expectedResult = 'Hello World';

    self::assertSame($expectedResult, trim($input));
}

Instead of duplicating the test method and just changing the inputs, you can use Data Providers:

<?php

/**
 * @dataProvider provideTrimData
 */
public function testTrim($expectedResult, $input): void
{
    self::assertSame($expectedResult, trim($input));
}

public function provideTrimData()
{
    return [
        [
            'Hello World',
            ' Hello World',
        ],
        [
            'Hello World',
            " Hello World \n",
        ],
    ];
}

Data Provider is just a regular public method in the test case class which returns an array of arrays.

  • You link it to the test method with a @dataProvider annotation followed by the method name.
  • Parameters returned from the data provider are added to the method definition. (I prefer to pass the expected value as a first parameter to match the assert* methods)
  • PHPUnit runs the test method with each data set as a separate test.

Here is a screenshot of running the test above in PhpStorm: PHPUnit: basic data providers in PhpStorm

Now you know how to use basic Data Providers. In the rest of the article I will dive into more advanced stuff and tips.

Tip #1: Always name the data providers

By default, each data provider is referenced by its array index. It means that when running it, PHPUnit will tell you, that the test failed with data set #0.

To prevent confusion when having lot of data providers, you should always name them. Because the data provider method returns a regular array, it is as easy as adding keys there:

<?php

public function provideTrimData()
{
    return [
        'leading space is trimmed' => [
            'Hello World',
            ' Hello World',
        ],
        'trailing space and newline are trimmed' => [
            'Hello World',
            "Hello World \n",
        ],
        'space in the middle is removed' => [
            'HelloWorld',
            "Hello World",
        ],
    ];
}

It makes test results much easier to understand:

PHPUnit: named data providers in PhpStorm

I recommend that you name the data sets the same way you would use for separate tests.

Tip #2: You can run single data set from data provider

When there is something wrong with one of the data sets, you probably want to run the test only with it. You can do so by using PHPUnit's --filter option in CLI.

Here are examples of what is possible (the documentation shows examples with ', but that does not work on Windows, where you have to use " to wrap the argument):

  • --filter "testTrimTrims#2" runs data set #2 (third data set, as the array keys start at zero)
  • --filter "testTrimTrims#0-2" runs data sets #0, #1 and #2
  • --filter "testTrimTrims@trailing space and newline are trimmed" runs specific named data set
  • --filter "testTrimTrims@.*space.*" runs named data sets that match the regexp

Don't forget to check the other possible patterns in docs.

PhpStorm does not currently allow you to run a single data set from the code (please vote for the issue WI-43933), but you can run all of them and then rerun one from the test results. When you have the JetBrains issue tracker open, please also vote for WI-43811 (possibility to go to the data set from the test results).

When I want to run a single data set from the PhpStorm I usually just comment out all the other data sets.

Tip #3: Add type definitions

I always add type hints to the method definitions when possible. When using data providers, it means adding parameter type hints to the method that accepts data sets and adding a return type (and phpdoc) to data provider method:

<?php

/**
 * @dataProvider provideTrimData
 */
public function testTrimTrims(
    string $expectedOutput,    // <-- added typehint here
    string $input              // <-- added typehint here
): void
{
    self::assertSame($expectedOutput, trim($input));
}

/**
 * @return string[][]          // <-- added typehint here
 */
public function provideTrimData(): array     // <-- added typehint here
{
    return [
        'leading space is trimmed' => [
            'Hello World',
            ' Hello World',
        ],
        'trailing space and newline are trimmed' => [
            'Hello World',
            "Hello World \n",
        ],
    ];
}

If you need to have a nullable type in the test method, I recommend splitting it into two separate methods and data providers. Instead of having testTransformData(?string $expectedResult, string $input) with a nullable parameter I would create those:

testTransformData(string $expectedResult, string $input) testTransformingInvalidDataReturnsNull(string $invalidInput)

Tip #4: Data providers are supported well in PhpStorm

Despite the issues I mentioned above (WI-43933 and WI-43811) I think that Data providers support in PhpStorm is quite good.

When you reference non-existing data provider, you can use quick action to generate it: PhpStorm: create data provider quick action

Auto-completion of data provider name works in the @dataProvider annotation: PhpStorm: rename data provider refactoring

Renaming the data provider using Rename refactoring also works as expected: PhpStorm: rename data provider refactoring

Tip #5: More complex data providers

Instead of having a static array written in the code, the data providers can be more complex and prepare the data set dynamically.

For example, when having the external data, you can easily generate resulting array this way:

<?php
/**
 * @return string[][]
 */
public function provideSpams(): array
{
    $spamStrings = require __DIR__ . '/fixtures/spams.php';

    $result = [];
    foreach ($spamStrings as $spamString) {
        $result[mb_substr($spamString, 0, 40)] = [$spamString];
    }

    return $result;
}

You should be careful with adding lot of logic to the data provider. Otherwise you would have to write a test that tests the data provider...

You can even return instances from the data provider:

<?php

public function provideDateTimesPartOfDay(): array
{
    return [
        [
            'morning',
            new DateTimeImmutable('2018-10-01 10:00:00'),
        ],
        [
            'afternoon',
            new DateTimeImmutable('2019-09-01 15:00:00'),
        ],
    ];
}

Tip #6: You can use Closures in Data providers to delay evaluation

The disadvantage of data providers is that they are evaluated before anything else (to allow PHPUnit calculate the total number of tests). It means that they can't access anything initialized in setUpBeforeClass() or setUp().

You can work around this limitation by returning closures from data providers. Have a look at the code bellow - data provider returns a closure which is called in the test itself.

<?php

/**
 * @dataProvider provideDateTransformations
 */
public function testWithClosuresInDataProvider(
    string $expectedResult,
    Closure $setTime
): void
{
    $dateTime = new DateTime('2019-09-01');

    $setTime($dateTime);

    self::assertSame($expectedResult, $dateTime->format('Y-m-d H:i:s'));
}

public function provideDateTransformations()
{
    return [
        'midnight' => [
            '2019-09-01 00:00:00',
            function (DateTime $date): void {
                $date->setTime(0, 0, 0);
            },
        ],
        '3 o\'clock in the afternoon' => [
            '2019-09-01 15:00:00',
            function (DateTime $date): void {
                $date->setTime(15, 0, 0);
            },
        ],
    ];
}

Tip #7: Use yield to simplify large nested arrays

Instead of having large arrays in the data provider, you can use yield for each data set:

<?php
public function provideTrimData()
{
    yield 'leading space is trimmed' => [
        'Hello World',
        ' Hello World',
    ];
    yield 'trailing space and newline are trimmed' => [
        'Hello World',
        "Hello World \n",
    ];
    yield 'space in the middle is removed' => [
        'HelloWorld',
        'Hello World',
    ];
}

I think it may help with code readability for large arrays. However similarly to arrays, all yields are evaluated before tests start (PHPUnit calculates the total number of tests before running them).

Tip #8: Don't use @testWith annotation

Instead of using a separate method for data provider, PHPUnit supports inlining the data sets as JSON in PHPDoc using the @testWith annotation.

<?php
/**
 * @testWith
 *        ["Hello World", " Hello World"]
 *        ["Hello World", "Hello World \n"]
 *
 */
public function testTrim($expectedResult, $input): void
{
    self::assertSame($expectedResult, trim($input));
}

Please do not use this, because PHPDocs is not a good place to put your code:

  • syntax highlighting does not work there
  • IDE code validation does not work there
  • automatic code formatting does not work there
  • it cannot be analysed statically by PHPStan

Conclusion

Do you have other tips to use Data Providers even more efficiently? Please share them in the comments!

]]>
<![CDATA[Don't put .idea and .vscode directories to project's .gitignore]]> 2019-08-26T00:00:00.000Z https://blog.martinhujer.cz/dont-put-idea-vscode-directories-to-projects-gitignore/

tl;dr: Don't put .idea and .vscode directories to project's .gitignore. You should configure a global .gitignore for your machine instead.

When you are using git (or any other version control), there are some temporary files in the directory structure, which should not be included in the repository. Usually they are listed in the .gitignore file in the project root directory.

What if I told you that there are other ways to exclude temporary files from the project? There are three.

1. .gitignore file in the project's root

.gitignore in the project is the most important one. In it you should list any files or directories which are created by the application itself. Best examples are cache files, logs, local configs etc.

In the Symfony application your .gitignore may look like this (I included an explanation on each line):

/.env.local   <-- local config
/.env.*.local   <-- local config
/var/   <-- cache and logs
/vendor/   <-- dependencies installed through Composer

# PHPUnit
/phpunit.xml   <-- local PHPUnit config used for overriding the default phpunit.xml.dist
.phpunit.result.cache   <-- PHPUnit cache files

# PHPCS
/phpcs.xml   <-- local PHPCS config used for overriding the default phpcs.xml.dist
.php_cs.cache   <-- PHPCS cache file

The important thing is that those files are created by the application itself by either building it, running it or doing some work on it.

2. Global .gitignore for your machine

Some files or directories present in the application directory are not created by the application itself, but by the operating system or other applications. Those shouldn't be excluded using the project's .gitignore, because they may differ from developer to developer.

Common examples are .idea (PhpStorm), .vscode (VS Code), Thumbs.db (Windows thumbnails cache), .DS_Store (some macOS cache).

There is a perfect place for them - the global .gitignore file for the machine. When you add something there, it is ignored in any repository, so you don't have to exclude those files in every project you happen to be working on.

You configure the path to the global .gitignore in the .gitconfig file which usually resides in your home directory:

# add this to ~/.gitconfig:

[core]
    excludesfile = ~/.gitignore

And create the .gitignore file in your home directory:

# create ~/.gitignore

# PhpStorm
.idea

# VSCode
.vscode

From now on, those will be ignored in any git repository on your machine.

Quite often I see people adding those anyway. From a quick Github search you can see that there are almost 200k results for commits which mention some commonly ignored directory:

There is no point in adding those for the internally developed applications, as you can nudge each developer to properly configure his workstation. But if you are managing an open-source application or library, you may want to make it easier for newcomers to submit patches - even though you know it is not a clean solution. On the other hand, do you expect to receive high-quality contributions from developers who don't bother to properly configure their workstations?

3. .git\info\exclude

For the sake of completeness, I must mention the third option. You can use .git\info\exclude file to exclude files for a single repository. But those exclusions are not versioned, so the others won't benefit from them.

I can't remember using it, but you may find it useful in some situations.

Conclusion

Imagine that there is a new editor called Extra Textedit with an advanced AI which really helps with coding. As it becomes more popular, there will be a flood of commits and Pull Requests with add .eedit directory to .gitconfig.

Please use the global .gitignore and don't make the people on the internet spend hundreds or thousands of hours on this.

Btw. I recommend reading the gitignore documentation to learn more about the patterns you can use to exclude files.

]]>
<![CDATA[Oslo - co vidět? Kam na výlety?]]> 2019-08-15T00:00:00.000Z https://blog.martinhujer.cz/oslo-kam-na-vylety/ V červenci 2019 jsme byli týden v Oslu a stihli jsem toho spoustu, včetně dvou zajímavých hike za město, tak třeba se vám to bude hodit jako inspirace.

Výhled na Oslo z Ekebergparken

Cesta do Osla

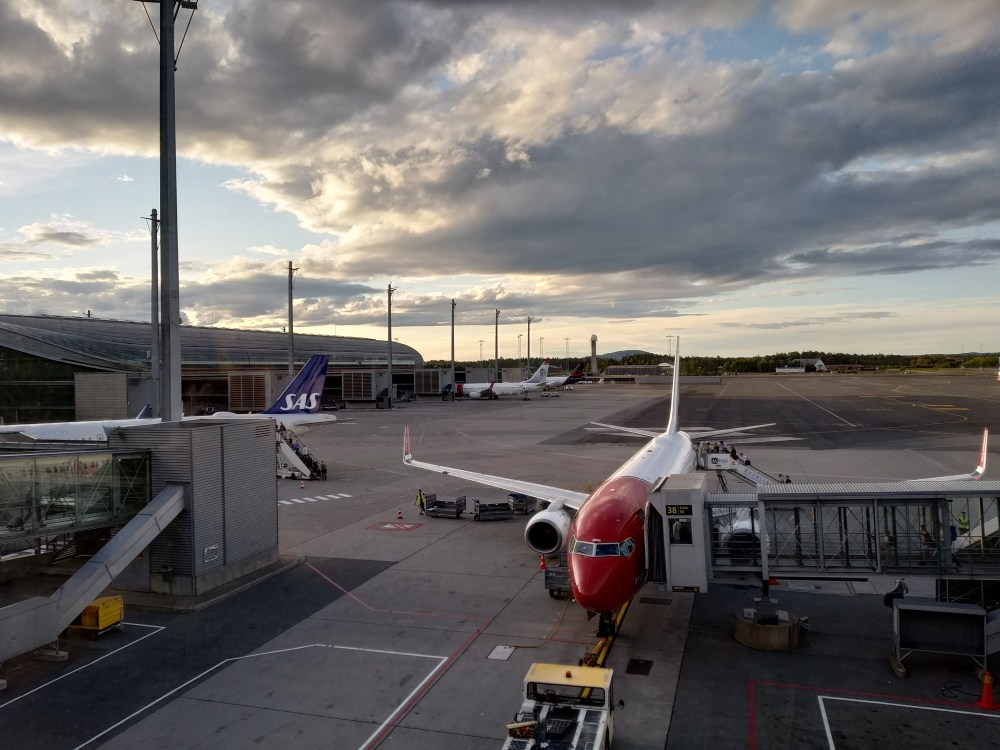
Letěli jsme z Prahy s Norwegian. Tím, že jsme byli docela omezení ve výběru termínu, tak nás nakonec zpáteční letenky (pro oba) stály 8700 Kč. Několik dnů po zabookování nám přišel mail, že zpáteční let ruší a že nás přehodili na jiný den. Pokud je to více než 14 dnů do odletu, tak to mohou klidně udělat. Ale v profilu pak šlo letenky zadarmo přebookovat na jiný termín, takže jsme zpáteční let přehodili na další den, na který ty lety předtím byly drahé. No a jako vždy jsme letěli jen s příručákem. Ani v Praze ani v Oslu velikost zavazadel neměřili.

MHD v Oslu

MHD v Oslu provozuje Ruter As a funguje to super. Na jízdenky se používá aplikace RuterBillet, kde si jízdenky přímo kupujete (existuje alternativa s nějakou plastovou kartičkou, to jsme nezkoumali). Koupili jsme si týdenní jízdenky. Výhoda je, že je můžete koupit dopředu a vybrat si čas začátku platnosti a případně je zapnout ručně. Kupodivu nefungovala platba kartou (MasterCard ani VISA, Airbank ani Fio), takže jsme platili PayPalem.

Většina Osla je v zóně 1, takže týdenní jízdenka nám stačila na tu jednu zónu. A na těch několik cest mimo si jde přes aplikaci přikoupit "Extra" na tu konkrétní zónu. Mají to hezky udělané, že místo toho, abyste museli zkoumat, jakou zónu chcete, jen vyberete, kam chcete jet a ono to ukáže, jakou zónu si máte koupit. Ty tickety na extra zónu jsou jen asi na hodinu až dvě, takže jde zase nastavit začátek platnosti a případně to těsně před nástupem do autobusu/lodi/vlaku odstartovat ručně.

Pro hledání spojů buď můžete používat Google Maps nebo jejich aplikaci RuterReise (ta ukazuje i zóny).

Většinu toho zvládnete linkami metra, které kromě centra jezdí po povrchu (historicky to bylo tak, že postupně zapojili samostatné tramvajové tratě do struktury metra).

Cesta z letiště

Z letiště je nejlepší jet vlakem VY. Pozor, na letišti mají mnohem lépe vidět prodej jízdenek do Airport Express Train (Flytoget), který stojí mnohem víc a není o moc rychlejší. Jízdenky na VY vlak si koupíte v automatu vlevo od toho Flytogetu. Nebo ještě lépe - pokud budete už mít dopředu koupenou jízdenku na MHD v RuterBillet, tak si jen přikoupíte zónu na letiště - je to levnější, než celá samostatná jízdenka.

Oslo - letiště

Peníze a nakupování

V Norsku je docela draho, cca 2-3× než v ČR. Vzhledem k tomu, že kurz NOK je 2.7 CZK, tak se dá docela dobře orientovat podle cen, které mají kde napsané - jsou podobné jako v ČR, jen nesedí měna :-) (streetfood 110-150 NOK atd.)

Zajímavost: V Norsku fungují zálohy na PET láhve a plechovky, podobně jako v ČR na láhve od piva. (video)

Všude se dá platit kartou. I když jsme došli lesem na takovou chatu, kde měli suché záchody, tak stejně měli terminál na karty. Stejně tak kiosek na ostrůvku u pláže. A veřejné záchodky v parku mají u dveří také terminál na pípnutí kartou. Takže jsme za celý týden neměli v ruce žádné norské peníze (ale nosili jsme nějaká eura, kdybychom s kartou náhodou někde neuspěli.)

Bydleli jsme na Airbnb, takže jsme si večeře vařili a k obědu jsme měli vždycky svačinu, protože jsme stejně byli někde na výletě. Suroviny v obchodě zas tak drahé nejsou (doporučuji supermarkety Kiwi nebo Rema 1000). A třeba takový chlazený losos stojí stejně jako v ČR ;-)

Když mluvím o bydlení, tak doporučuji bydlet na metru a max pár stanic od centra, ať ušetříte čas.

Elektroauta

V Norsku se prodává víc elektroaut než těch se spalovacím motorem. Je to hlavně kvůli různým úlevám pro EV a naopak ekologické dani z aut se spalovacím motorem (více info). Vzhledem k tomu, že většinu elektřiny (95 %) získávají z vodních elektráren, to zní jako super nápad. Nevýhoda je, že rozvodná síť na to není připravena a budou do ní muset hodně investovat.

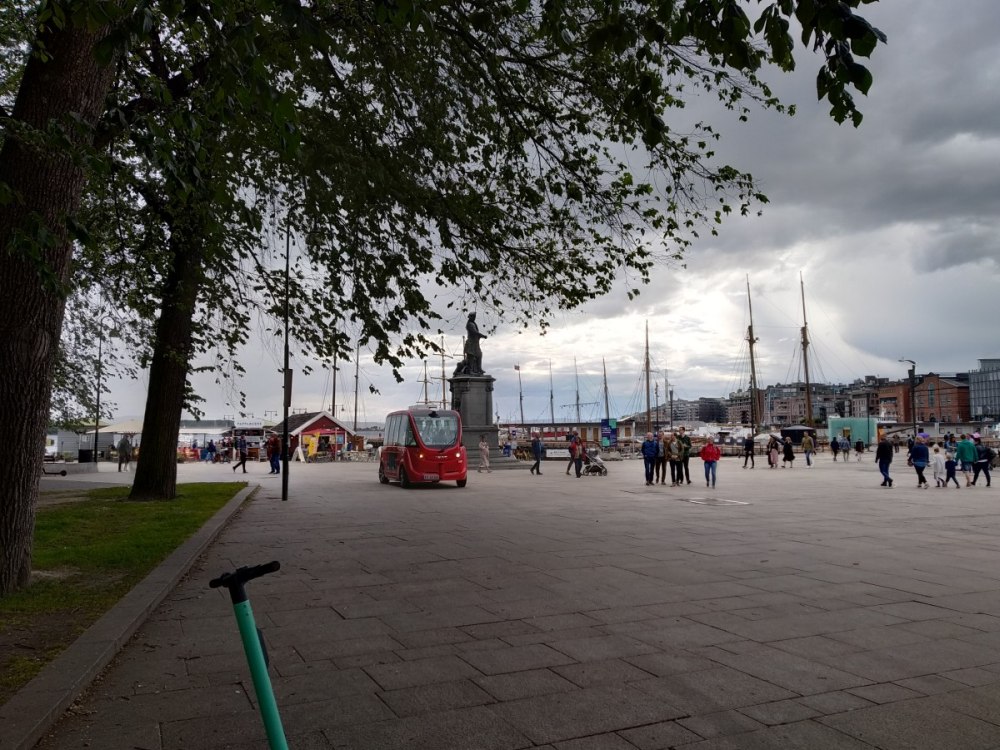
A s tím souvisí jedna zajímavost - Ruter (dopravní podnik v Oslu) zkouší na jedné krátké lince provozovat autonomní elektrické minibusy. To jsme samozřejmě museli vyzkoušet :-)

Autonomní miniautobus

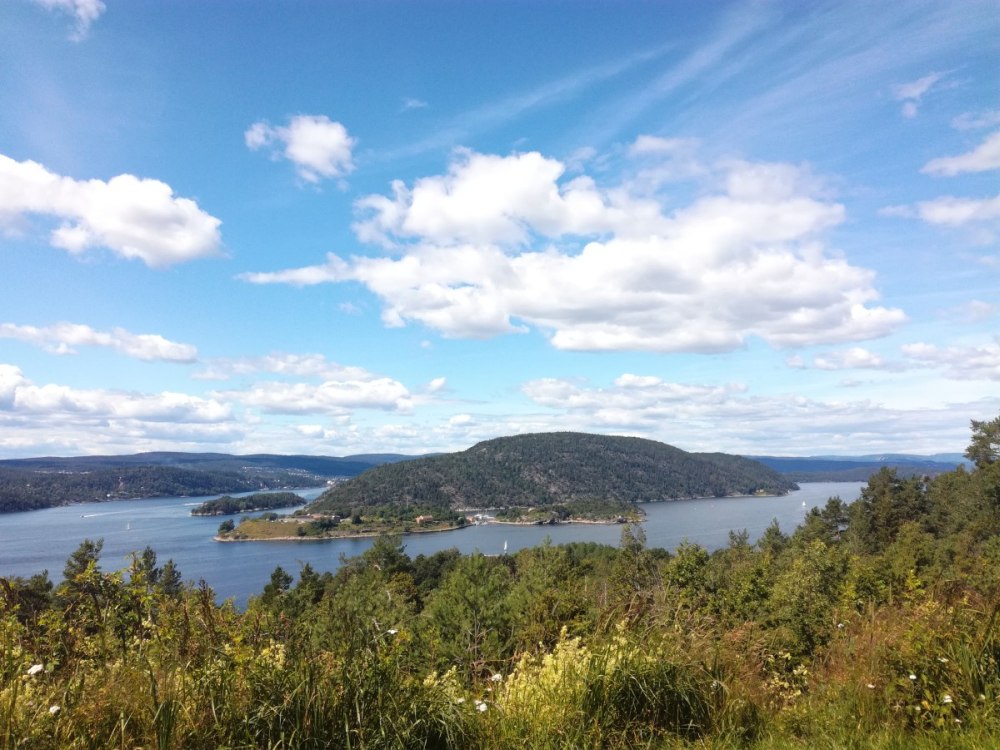
Drøbak a Oscarsborg - výlet lodí

Drøbak je vesnice asi 30km od Osla, kam se dá dojet MHD lodí (pozor, je potřeba přikoupit zóny - viz výše). Když budete stát frontu na trajekt, tak vám bude připadat, že se tam nevejdete - ale ta loď je fakt velká (cca pro 200 lidí), tak se nebojte.

Drøbak - cesta lodí

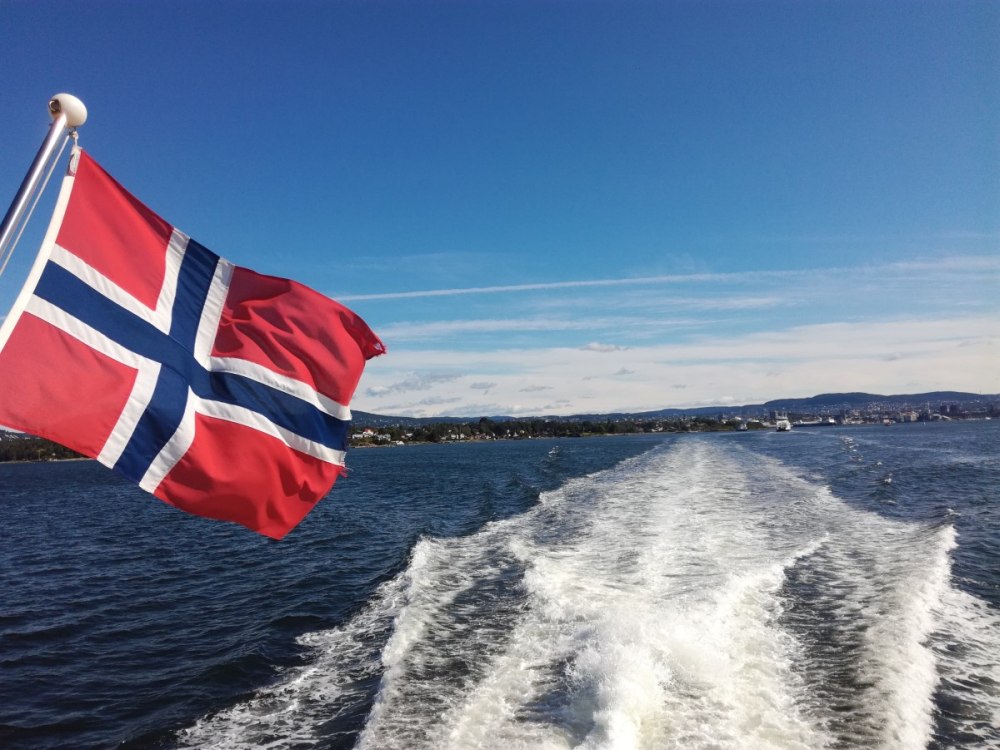
Lodí můžete dojet až do Drøbaku nebo vystoupit o zastávku dříve, na ostrově Oscarsborg, kde je vojenská pevnost. Odtamtud se pak dá do Drøbaku dostat přívozem. Je to dost důležité místo norských dějin, protože v roce 1940 se jim z té pevnosti podařilo potopit německý křižník Blücher a tím zbrzdit invazi Němců do Osla tolik, že norský král a vláda stihl utéci. Doporučuji přečíst článek na Wikipedii: Battle of Drøbak Sound. My jsme tam nebyli, protože jsem to zjistil až potom.

Drøbak - Oscarsborg

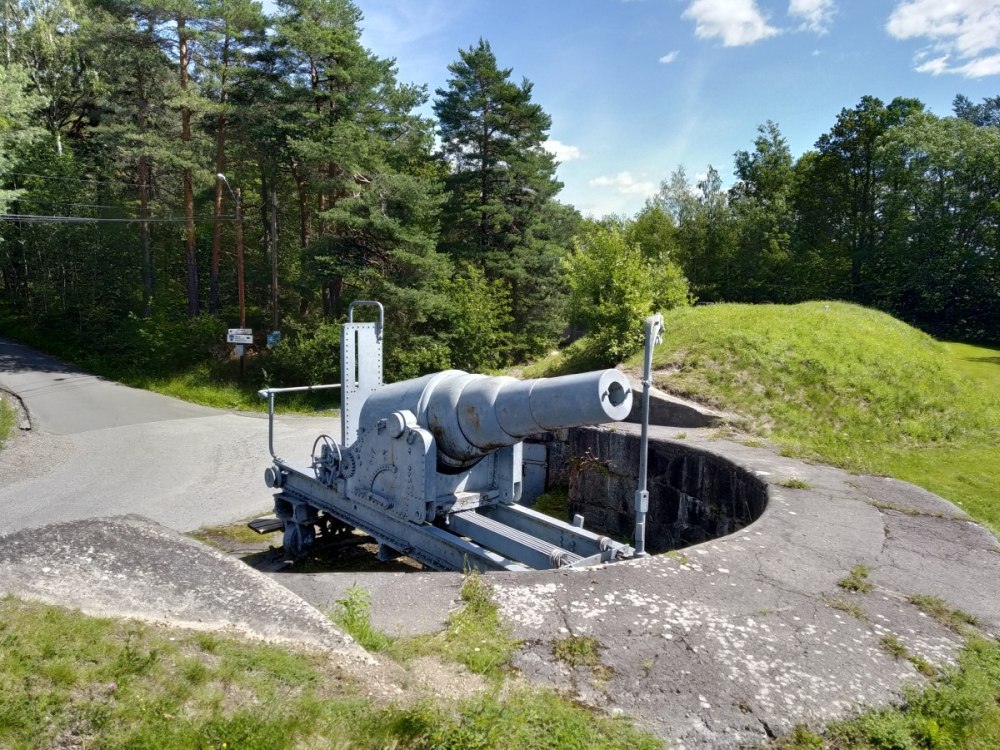
V samotném Drøbaku je zajímavá třeba pláž, Husvikbatteriet - dělo, které se přičinilo o potopení křižníku Blücher. A kousek na kopci Veisvingbatteriet - další děla, tentokrát v lepším stavu a se super výhledem na Oscarsborg.

Drøbak - dělo

Zpátky z Drøbaku jsme už jeli autobusem, kterým to je rychlejší, než lodí.

Østmarka hike (16 km)

Oslomarka je označení pro lesnatou a kopcovitou krajinu v okolí Osla, kterou Norové využívají k rekreaci (výlety, kola atd.). My jsme vyrazili do východní části nazvané Østmarka.

Østmarka - Svartputten

Østmarka

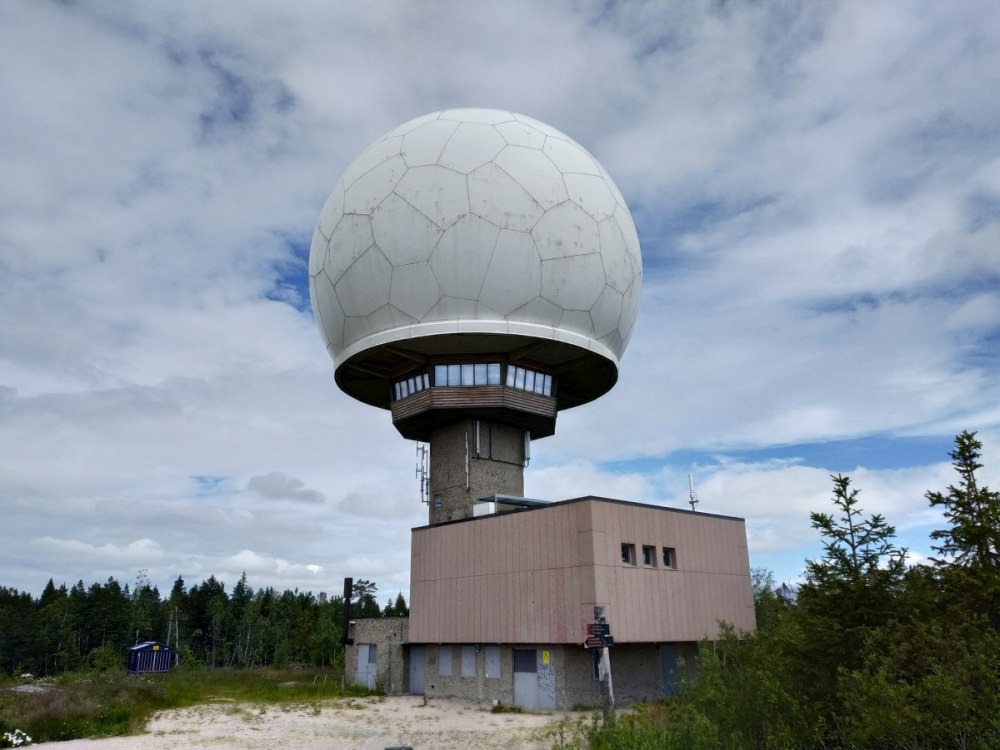
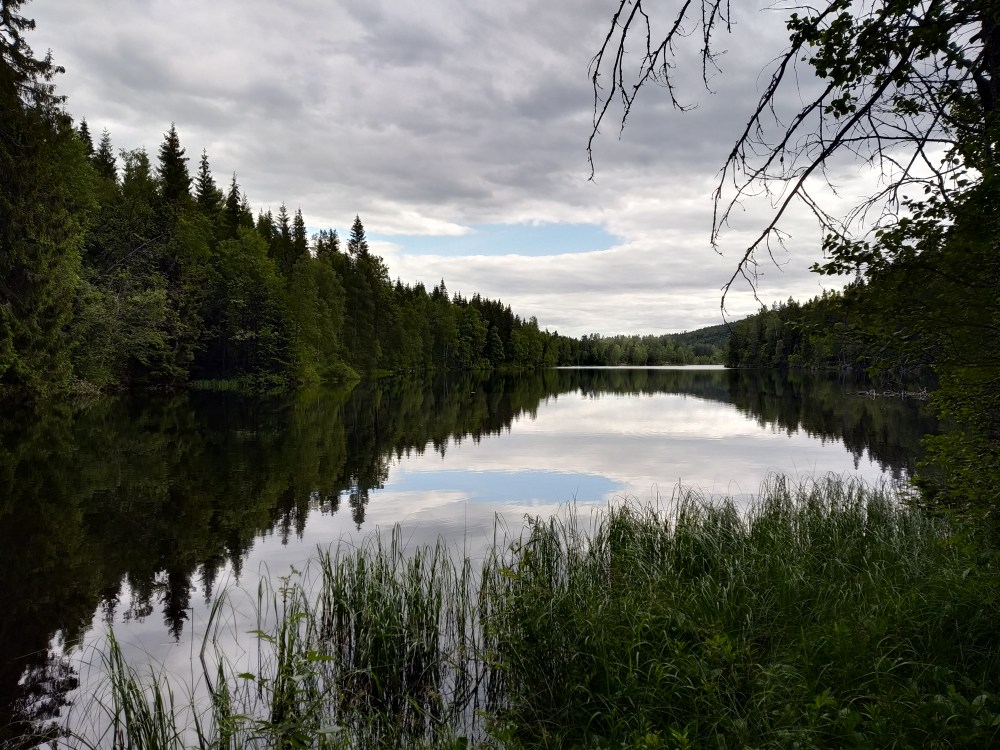
Metrem jsme dojeli na konečnou, do Ellingsrudåsen. Tam už kousek od východu z metra (který je vyražený ve skále!) začíná turistická trasa. Nejprve jsme šli kousek po hlavní turistické, která je zároveň cyklostezka, ale pak jsme odbočili směrem na Haukåsen. Většinou se nám podobné pokusy - třeba vylézt na nějaký vysoký kopec v okolí - odmění fajn zážitkem. Cestou jsme si udělali malinkou odbočku k jezeru Svartputten a pokračovali jsme se na Haukåsen. Ten je zajímavý zejména tím, že tam je umístěný radar.

Haukåsen radar

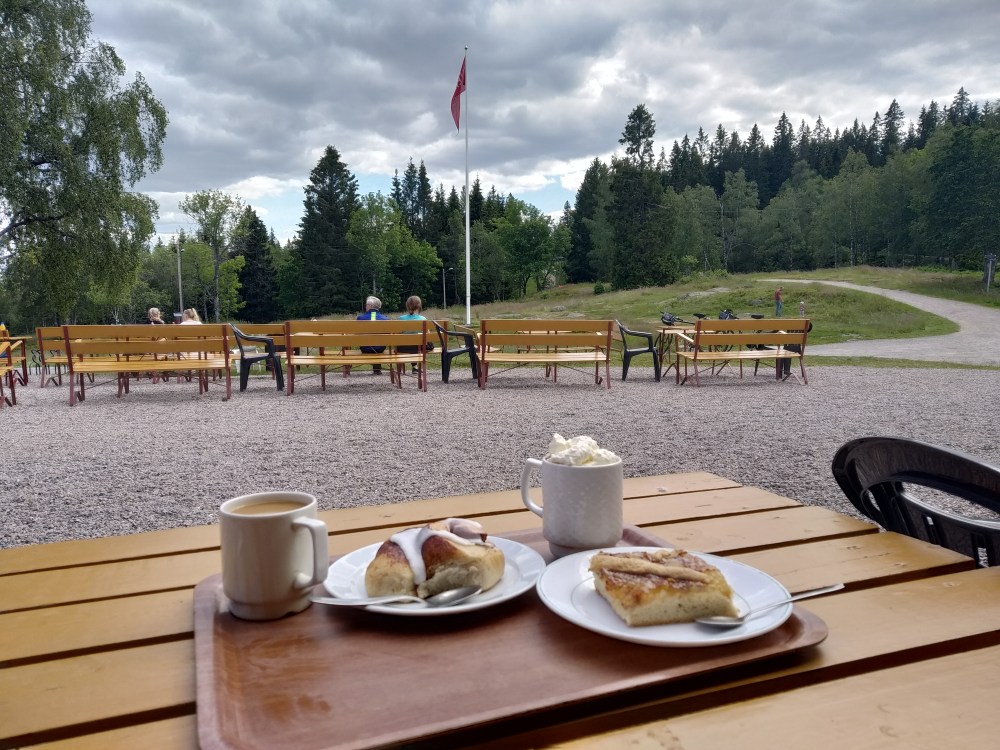
Odtamtud jsme došli na chatu Mariholtet, kde se dá občerstvit. Co nás hodně překvapilo bylo, že si místní nedávají pivo, ale kávu nebo colu. To by se v Čechách nestalo :-)

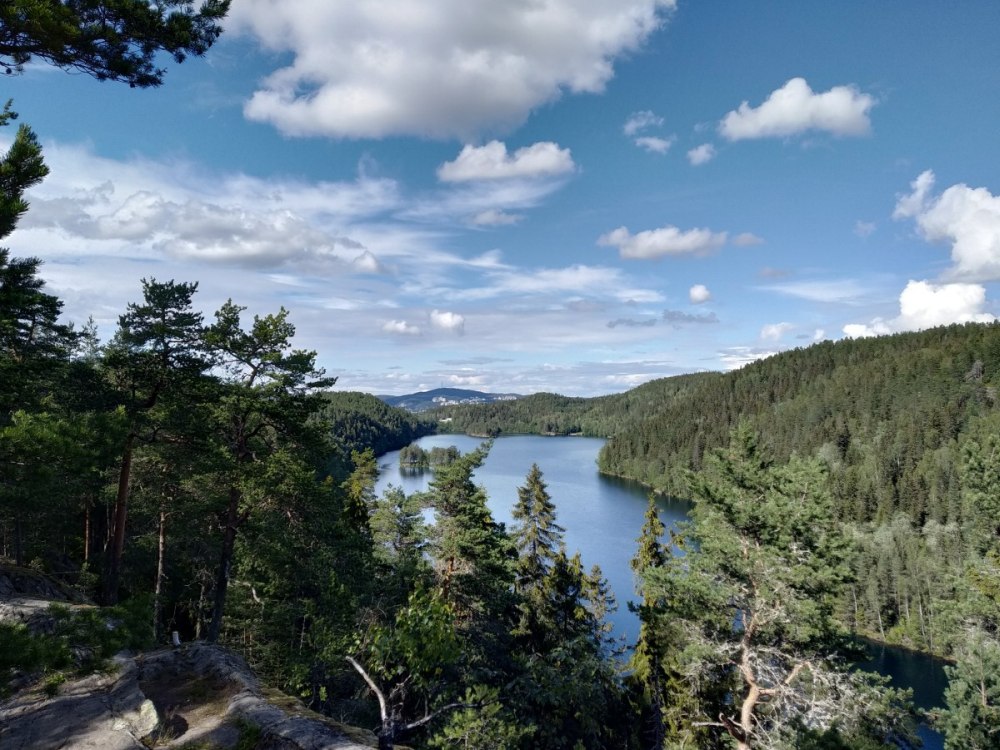
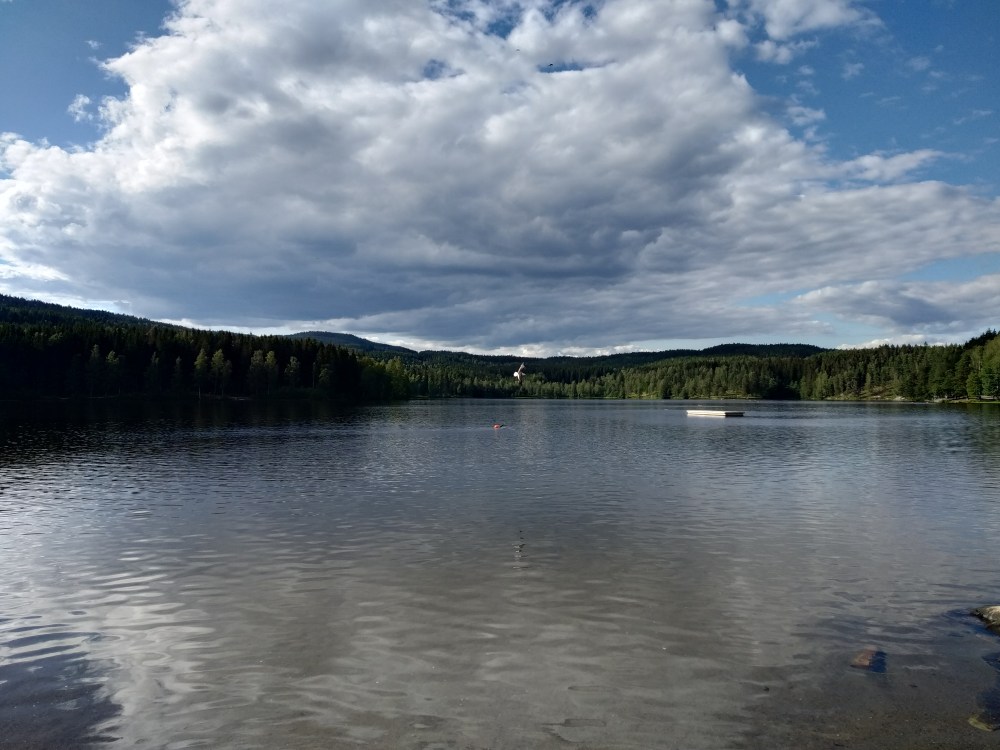
Dál jsme pokračovali po červené a pak po západní straně jezera Lutvann, odkud byl super výhled. Nakonec jsme došli na metro do Haugeurd a jeli domů.

Østmarka - Lutvann

Mrkněte na celou trasu na Wikiloc.

Výhoda chození na výlety v Norsku v létě je, že vám díky pozdnímu soumraku nehrozí, že byste se do tmy nestihli vrátit.

Holmenkolen

Holmenkollen je známý skokanský můstek, kde se konají různé důležité závody (nejen) ve skocích na lyžích. První můstek tam byl postaven koncem 19. století a zajímavé je, že ho jednou za čas zbourají a pak postaví nový a větší (naposledy v roce 2010).

Holmenkolen

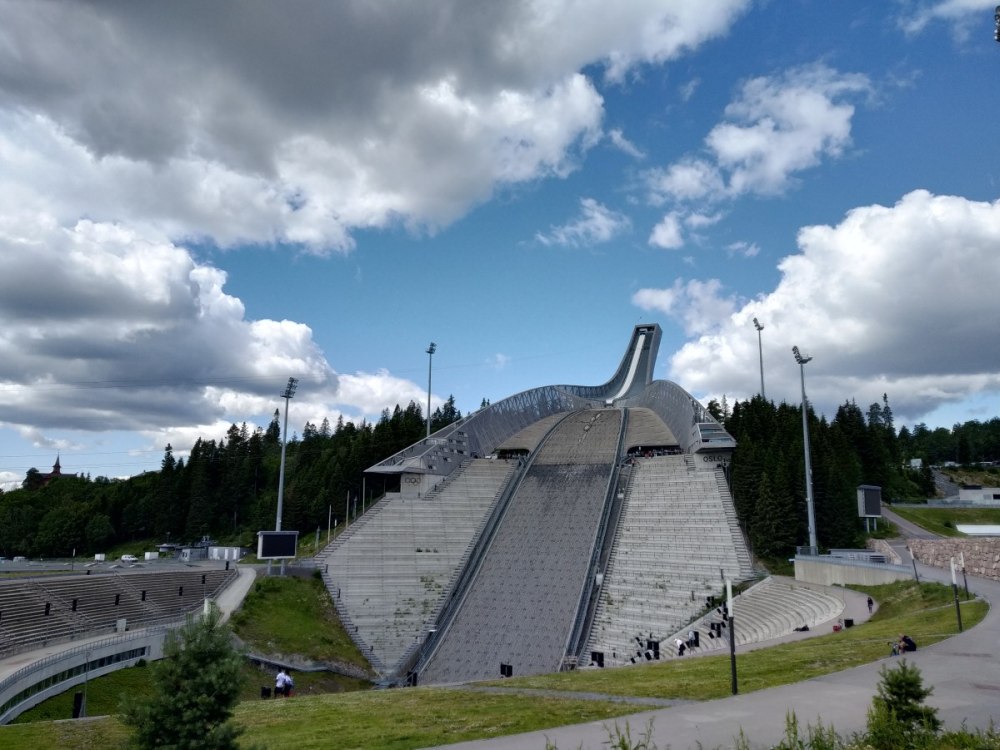
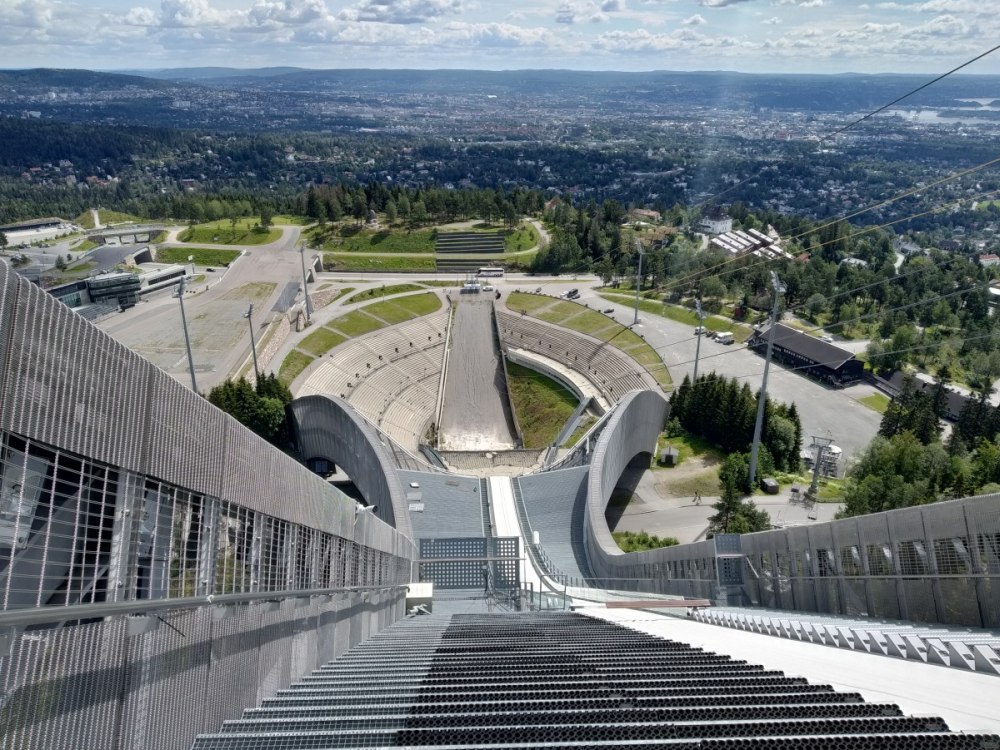
Metrem dojedete do stanice Holmenkollen a odtamtud dojdete kousek k můstku. Součástí areálu je muzeum, které popisuje historii samotného můstku, ale i polárních výprav. V ceně vstupenky je i výstup (resp. vyvezení se výtahem) na vršek můstku, odkud je super výhled. Doporučuji jít nejdříve vystát tu frontu na výtah, čím tam dorazíte později, tím je větší. Ale muzeum určitě nevynechejte (můžete si ho projít až po návratu z vyhlídky).

Kromě výhledu nabízí horní plošina možnost sjet si dolů na zipline - ale mě to teda přišlo dost vysoko :-) (na fotce jsou vidět ta ocelová lana)

Holmenkolen

Hike přes Vettakollen a Ullevålseter k jezeru Sognsvann (15 km)

Z Holmenkollen jsme popojeli pár stanic na zastávku Vettakollen, odkud jsme vyrazili na další hike.

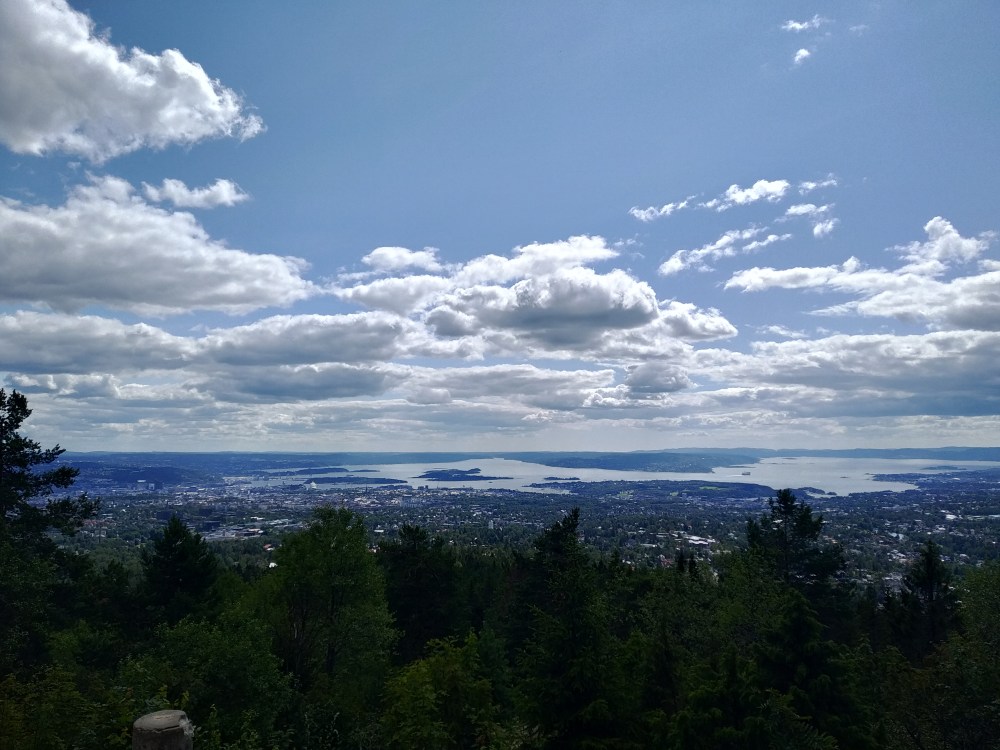
První část cesty je trochu do kopce, ale brzy přijde odměna v podobě super výhledu na Oslo (je to kupodivu dříve, než samotný vrchol Vettakollen - odtamtud není vidět nic).

Vettakollen výhled

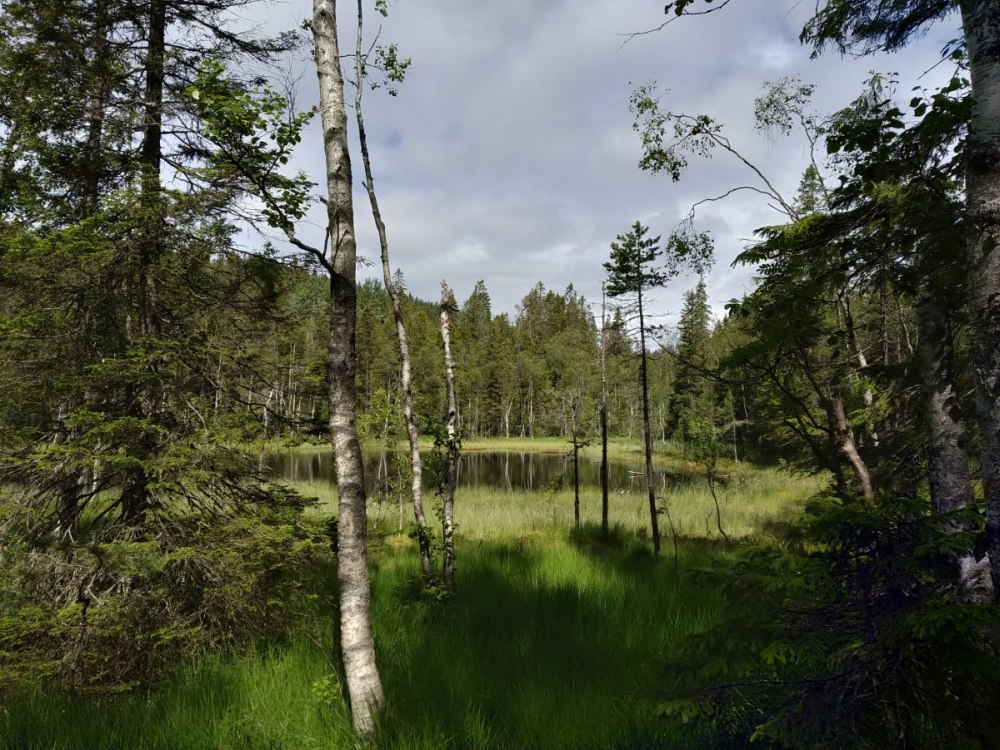
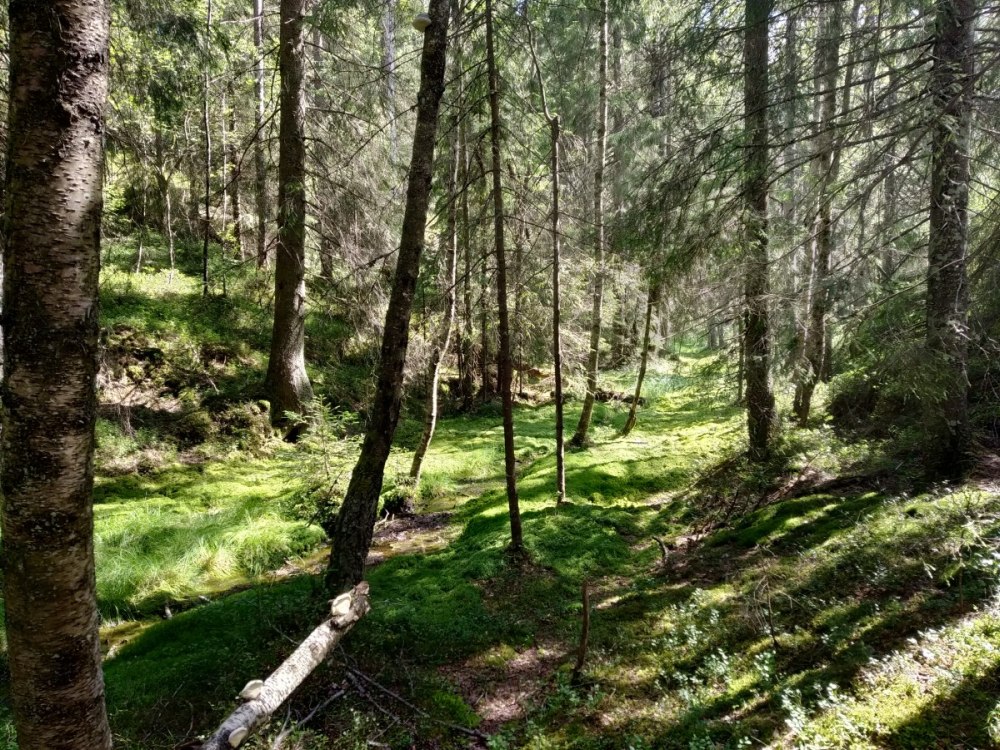
Pak pokračujete lesem, cestou občas potkáte nějaké jezero, jezírko nebo mokřad. Nejvzdálenějším bodem je Ullevålseter, což je taková horská chata, u které se potkávají různé turistické a cyklo trasy. I když to je uprostřed ničeho, tak samozřejmě jde platit kartou. A pozor, podle webu mají v pondělí zavřeno, tak ať vás to nepřekvapí. Dali jsme si tak ke svačině kávu, horkou čokoládu a něco sladkého.

Chata Ullevålseter

Jezero Lille Aklungen

Cestou zpět jsme šli kolem dvou velkých jezer, a nakonec jsme došli k jezeru Sognsvann. To je kousek od města, takže tam spoustu místních chodí běhat.

Celá trasa opět na Wikiloc.

Jezero Sognsvann

Grilování, jednorázové grily

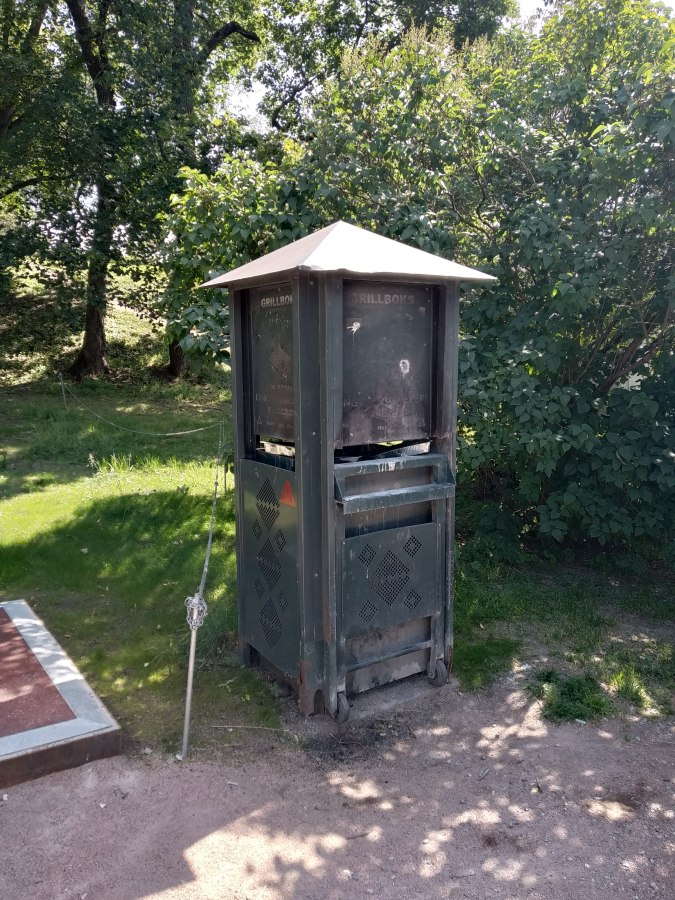
Možná to bylo tím, že jsme v Oslu měli dobré počasí, ale mezi místními je hodně populární grilování na jednorázových grilech (takové ten alobalový tácek naplněný uhlím). Grilují všude možně, třeba právě u toho jezera Sognsvann.

Hodně zajímavé je, že tomu museli přizpůsobit infrastrukturu. Na místech, která se hodí na grilování, mají kromě obyčejných košů také speciální kovový koš na vyhazování těch jednorázových grilů!

Koš na grily

Káva

Na kávu jsme nikam moc nechodili, takže mám jen jeden tip na kavárnu - Espresso House.

Na Airbnb byl Nespresso kávovar, takže jsme si kávu vařili doma. S tím souvisí zajímavost - jak jsem psal výše, tak všechno je v Norsku 2-3× dražší, ale Nespresso kapsle stojí v přepočtu stejně jako v ČR (NOK 3,89 vs CZK 9,90). Pro kapsle jsme se stavili v Nespresso obchodě na jejich "Pařížské".

Oslo - ostrovy Langøyene a Gressholmen

Kromě delší cesty lodí do Drøbaku, o které jsem psal výše, můžete v Oslu vyrazit MHD lodí na ostrovy, které jsou kousek za městem (a zase platí, že ta loď vypadá malá, ale vejde se tam spoustu lidí, takže nezůstanete na břehu ani když tam bude velká fronta).

My jsme nejdříve vyrazili na Langøyene, kde je fajn pláž. Kromě toho to je jediný z ostrovů, na kterém se může stanovat. Kousek od pláže je kiosek, který samozřejmě přijímá platební karty.

Odtamtud jsme přejeli na ostrov Gressholmen. Ten je mnohem více zarostlý, ale taky je na něm několik pláží. A zajímavostí je, že na něm kdysi bylo první norské letiště (pro hydroplány).

Oslo

A teď zajímavé věci v samotném Oslu.
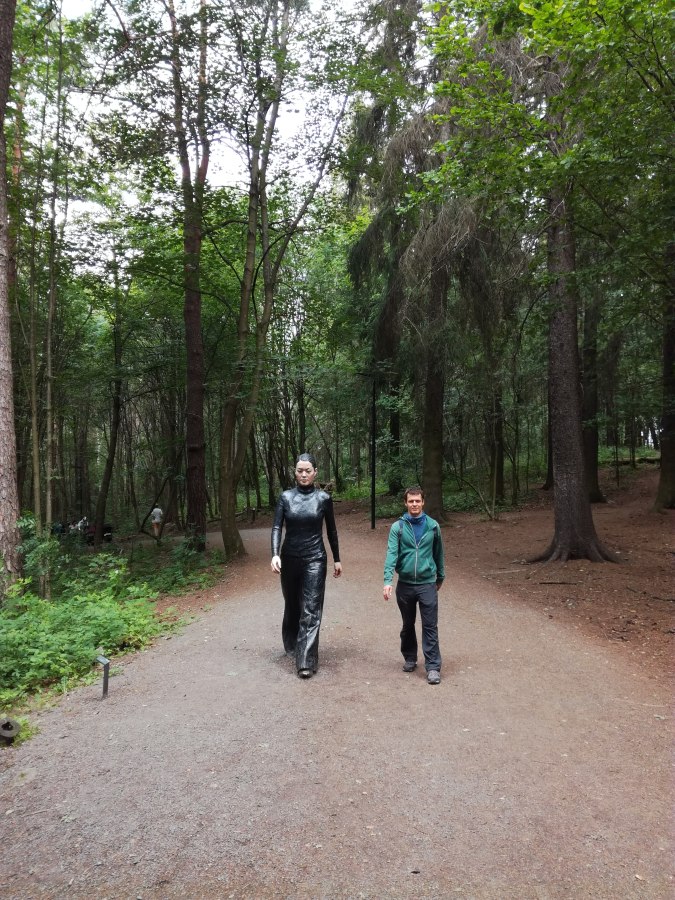
Ekebergparken

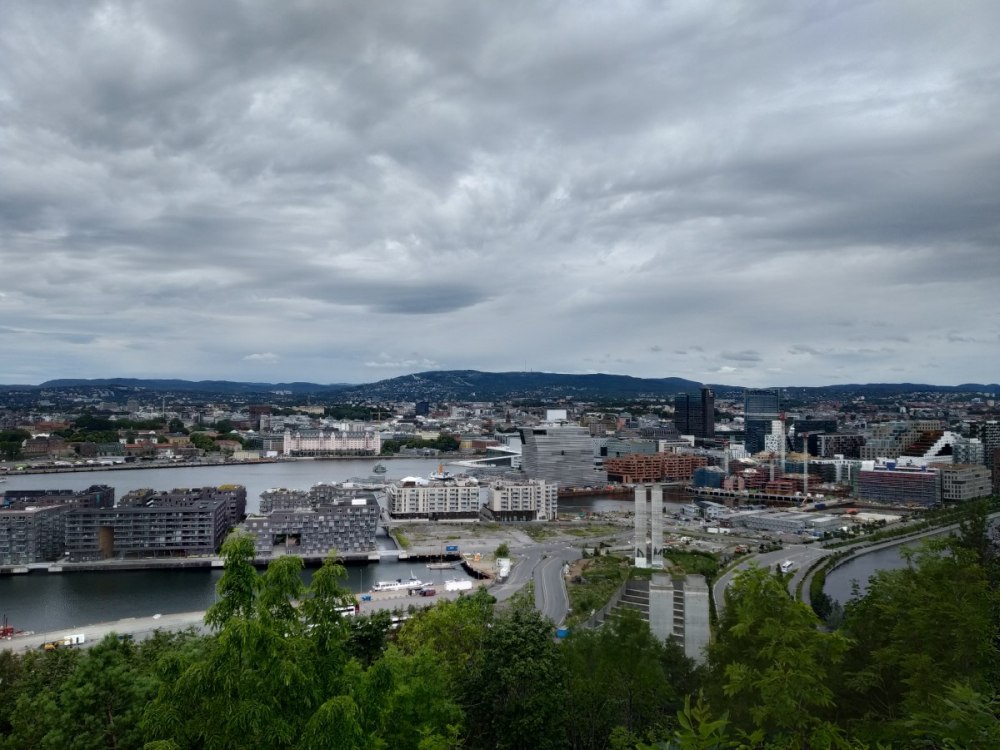
Ekebergparken je kopec s parkem na kraji Osla. Nejlepší je dojet tramvají přímo do zastávky Ekebergparken a odtamtud se projít po parku, prohlédnout si sochy a dojít na vyhlídku, odkud je vidět kontrast starých a nových budov v Oslu. Odtamtud se pak dá po cestičce sejít dolů do centra.
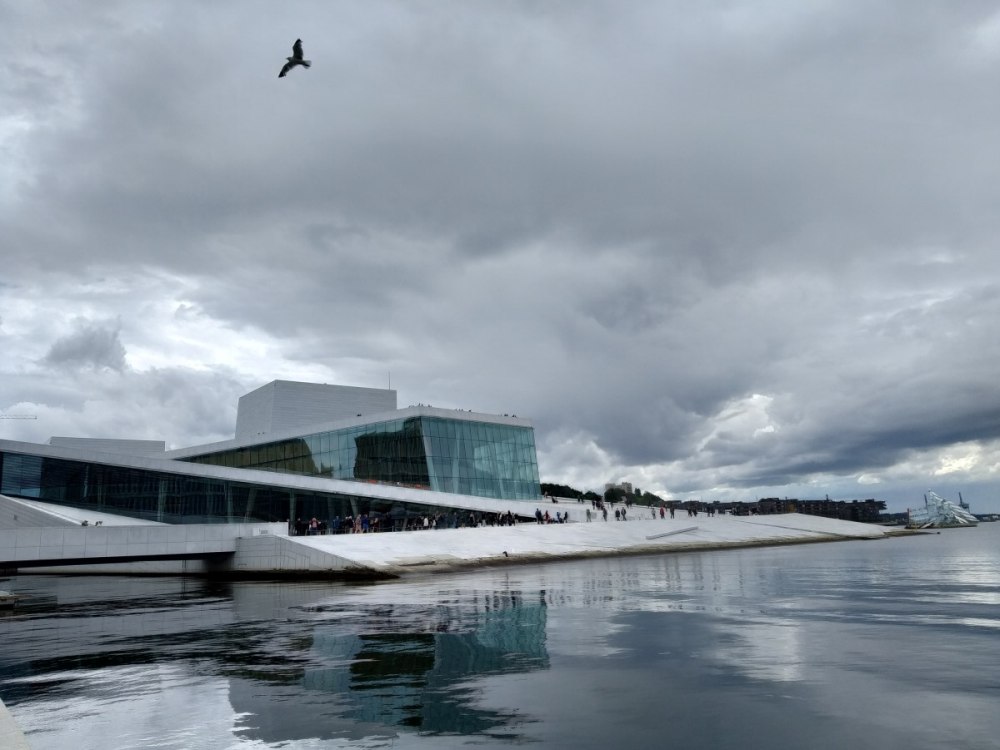
Sochy v Ekebergparken

Opera

Operahuset je zajímavé zejména tím, že je možné vyjít až na střechu, odkud je fajn výhled.
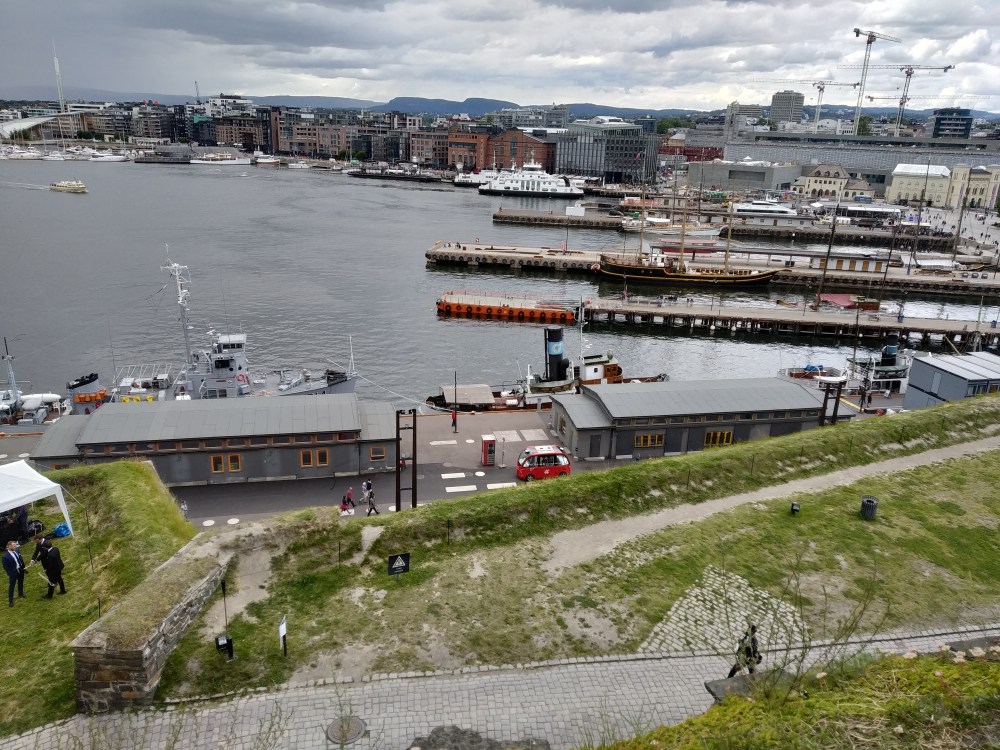
Oslo - Operahuset

Pevnost Akershus

Určitě doporučuji nevynechat pevnost Akershus - kromě historických budov je odtamtud hezký výhled na přístav.
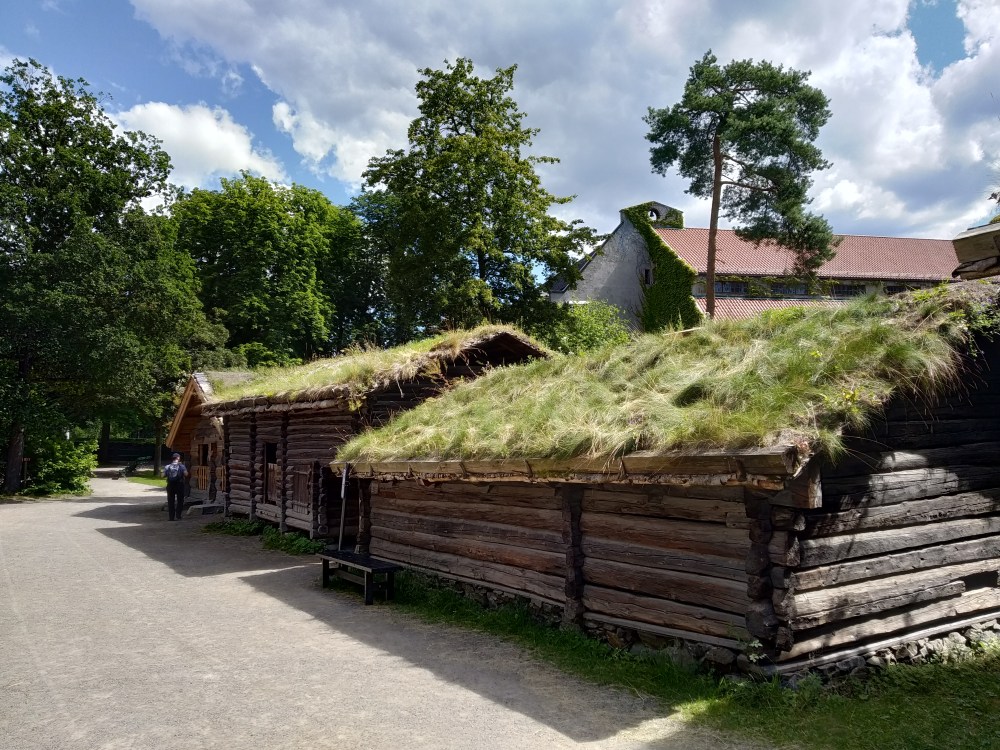
Akershus

Akershus - výhled na přístav

Norsk Folkemuseum

Do Norsk Folkemuseum postupně přemístili různé budovy, aby mohli ukázat, jak v minulosti žili lidé (nejen) na norském venkově. Areál si buď můžete projít sami nebo se připojit k některé z komentovaných prohlídek (doporučuji!). Nejvýznamnější památkou v muzeu je kostel přibližně z roku 1200, který koncem 19. století nechal král přestěhovat tam, kde je teď.

Norsk Folkemuseum - kostel

A jedna zajímavost, kterou jsme se tam dozvěděli. Určitě znáte takové ty domky se střechami porostlými trávou (a teď nemyslím moderní kancelářské budovy). Vždycky jsem myslel, že ta tráva tam má nějaký účel, ale ono ne. Jen holt tenkrát dávali na střechu vrstvu hlíny jako izolaci a shodou okolností z ní pak rostla tráva.

Norsk Folkemuseum - tráva na střeše

Playa de Huk

Když už kvůli Folkemuseum (nebo jinému muzeu) budete na poloostrově Bygdøy, tak si vezměte plavky a běžte se vykoupat na Playa de Huk. My jsme měli štěstí na počasí - bylo 28°C, takže pláž byla narvaná :-)

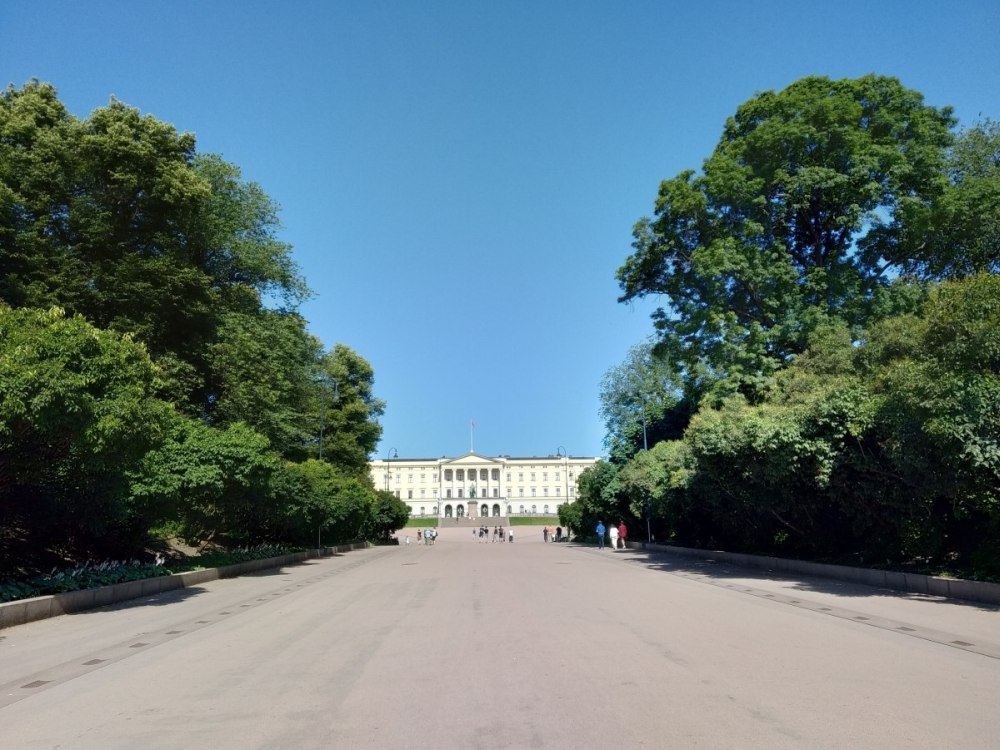
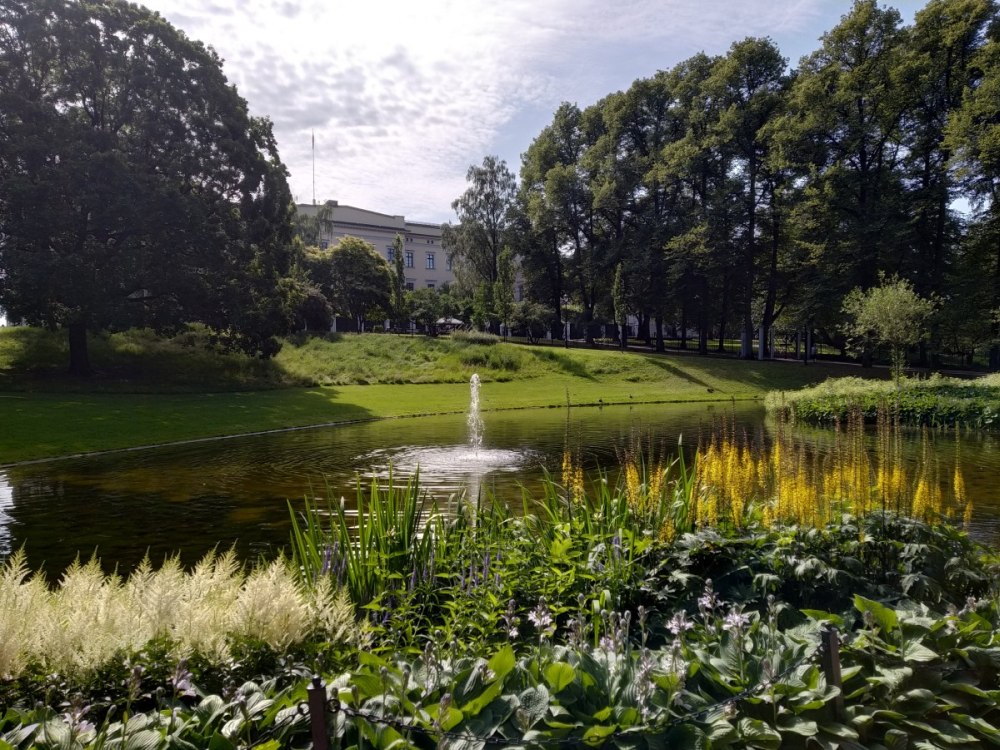
Královský palác a zahrada

Když už budete v Oslu, tak se určitě zajděte podívat na královský palác a do jeho zahrad.
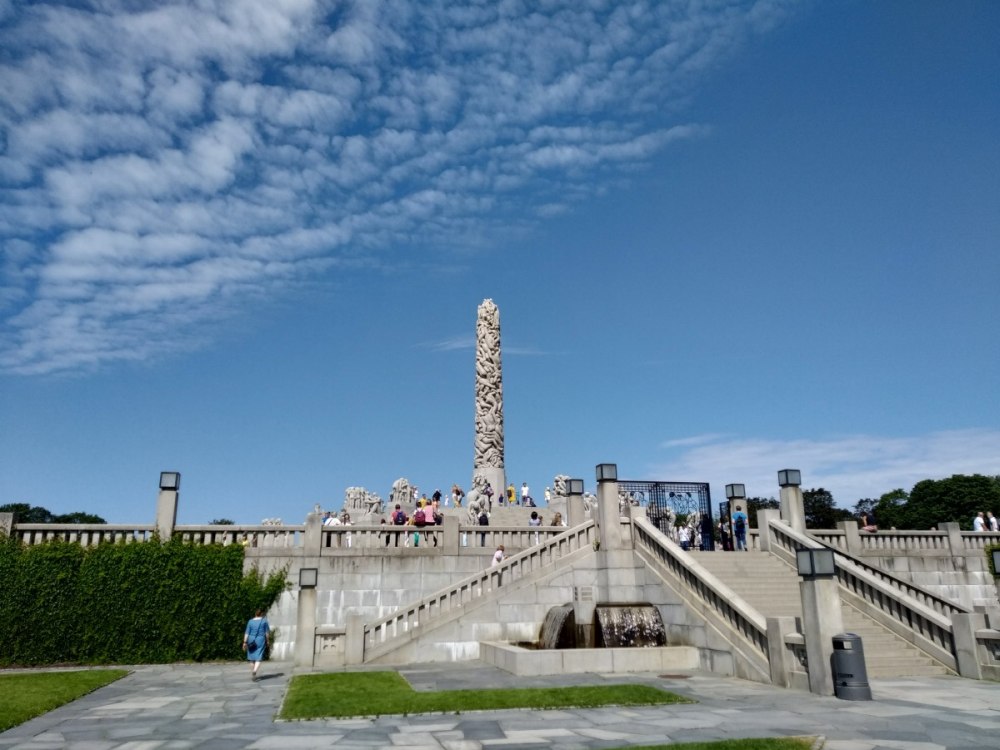
Královský palác

Královský palác - zahrada

Frognerparken

Velký park, jedno z více turistických míst. Zejména kvůli zajímavé fontáně obklopené turisty a sloupovému sousoší.

Frognerparken - fontána

Frognerparken - sousoší

Závěrem

V Oslu a jeho okolí toho je spoustu k vidění. Určitě doporučuji zařadit nějaké výlety za město než jen chodit mezi budovami.

]]>