When setting up Google Analytics (or Facebook Pixel) in the Google Tag Manager the typical approach is to put the UA-code or the Pixel ID into the Constant Variable. And that ID is then used in the GA/Facebook Tag.
But soon after launch the people from Marketing will start complaining that some strange orders and conversions are appearing in the Google Analytics.
What happened? Apart from real orders, also the orders made in testing and dev environments are sent there.
There is a better way. You can easily use different UA codes in production and in testing environments. In the rest of the article I will guide you through setting it up.
Analysis
It is clear that we want to use testing UA code in dev/test environments, but apart from that we also want to use it when testing the Google Tag Manager configuration itself with Preview feature (even on production website).
The decision process for the UA code goes like this:
- Are we running in Debug mode?
- YES: use test ID
- NO:
- Are we on production domain?
- YES: use real ID
- NO: use test ID
- Are we on production domain?
Preparation
-
Go to Google Tag Manager and create two Constant Variables:
GA_ID_DEVwith the testing IDGA_ID_PRODwith the production ID
-
In the Variables section in Built-In Variables enable
Debug ModeandPage Hostnamevariables.
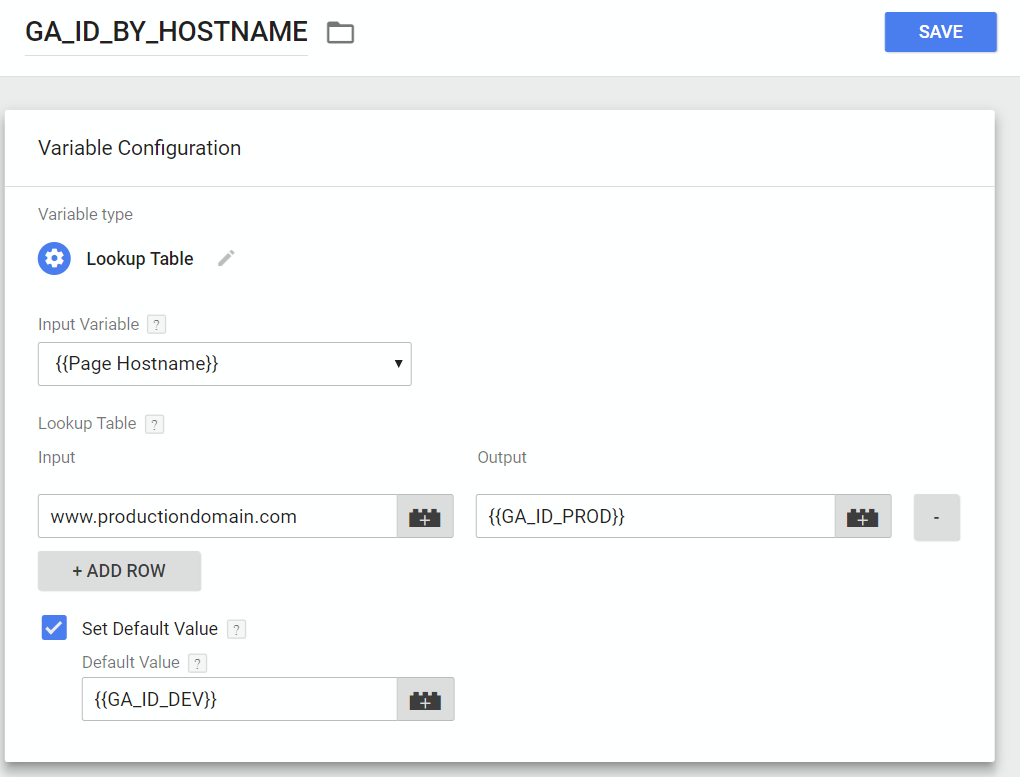
Setting up the hostname detection
- Create a Variable of type
Lookup Tableand name itGA_ID_BY_HOSTNAME - Input Variable is
{{Page Hostname}} - Click Add row
- Put your production domain into the Input field (just the domain without
https://and the trailing/) - Put
{{GA_ID_PROD}}into the Output field - Check Set default value checkbox
- Put
{{GA_ID_DEV}}to the Default value field
It should look like this:

By defining only the production domain and using default value for anything else, we handle any testing or dev environment.
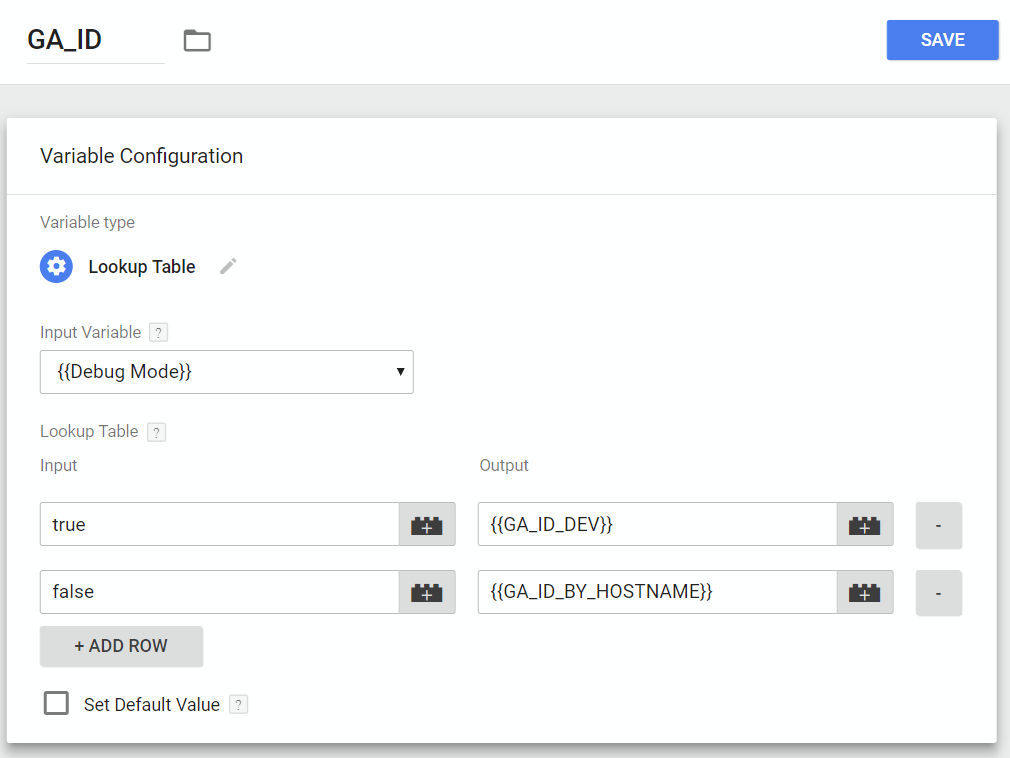
Setting up the Debug environment detection
If you look back into the Analysis chapter, we have covered the Are we on production domain? part. Now we will cover the Are we running in Debug mode?.
- Create a Variable of type
Lookup Tableand name itGA_ID - Input Variable is
{{Debug Mode}} - Click Add row
- Put
trueinto the Input field and{{GA_ID_DEV}}into the Output field - Click Add row again
- Put
falseinto the Input field and{{GA_ID_BY_HOSTNAME}}into the Output field
It should look like this:

You might have noticed that we have used the variable GA_ID_BY_HOSTNAME which we prepared in previous step.
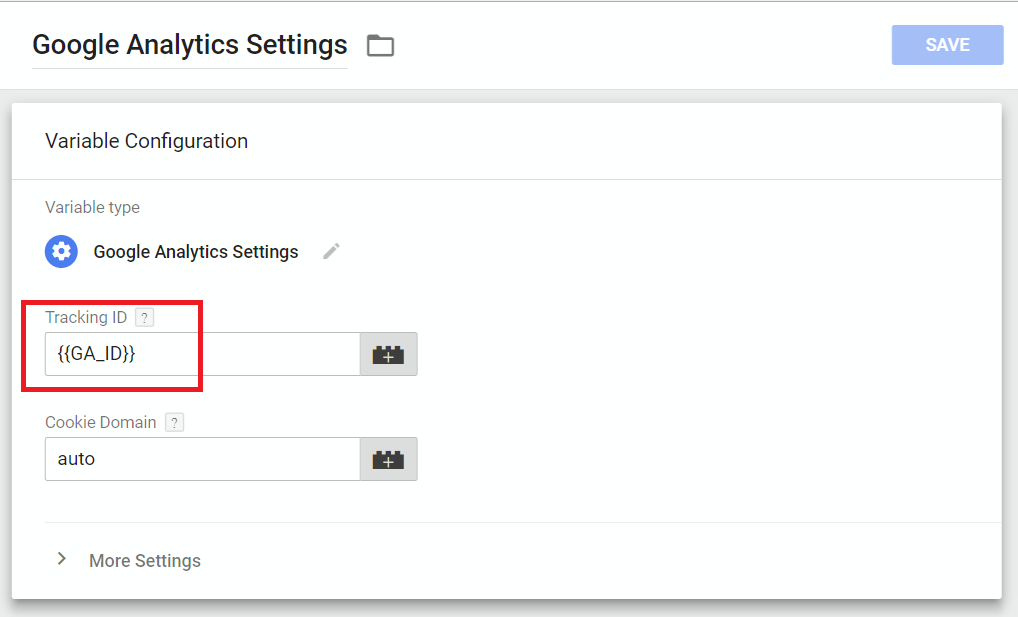
Setting up the Google Analytics Tag
With all those variables prepared, you can set up the Google Analytics tag as usual. But when creating the Google Analytics Settings, put {{GA_ID}} into the Tracking ID field as in the following picture. It will be resolved to correct UA code depending on the environment.

That's it!
Conclusion
Apart from Google Analytics ID, you can use this guide to set up Facebook Pixel ID or any other system where you can easily create different IDs for different environments.
Are you using similar approach? Or did you find a better way? Let me know in the comments!